double cleansing and my oil-based skincare routine
double cleansing and using oil as moisturizers
SKINCARE ROUTINE BELOW!!
* disclaimer * it does not cost you anything to use the links I provided, but I do make a really small commission off anything you purchase through those links. Think of it like… “thanks for the tips, girl! Your next matcha is on me!”
I am not providing this information as a cure-all! I am sharing my personal skincare routine as it has worked for me this way. I hope you see the same results on your skincare journey!
WHAT MY SKIN IS LIKE
My skin craves hydration, but is naturally oily (I classify myself as combination), so I have trouble with moisturizers.
When my skin is dry, it gets really flaky, but the next week it could be oily! Also, when it is oily, for some reason still feels sooooo dry. Ever since I started this oil-based skincare routine, my skin has TOTALLY evened out and is now balanced AF. I really hope this helps you. You shouldn’t be scared to try oils just because you think your skin is oily… sometimes your skin is overproducing oil because the products you’re using aren’t actually working.
WHAT IS DOUBLE CLEANSING?
The use of a cleansing oil, balm, or micellar water to break down dirt, oils, SPF. on your skin first. The second step to the cleansing is using a water based facial wash to get a deeper clean.
If this sounds confusing let me break it down to something easier to process (this is how I understood it best). Using an oil to clean your face essentially lifts all the nasty gunk off your skin - makeup, sunscreen, dirt, etc. It separates/ lift these things FROM your skin, this way, when you actually wash your face with a cleanser, the cleanser does it’s intended job - clean your face. How can washing your face once actually get rid of everything it’s been exposed to all day? It can’t. This is why double cleansing, AND using oils to hydrate + fight fine lines have saved my skin.
MY OIL-BASED SKINCARE ROUTINE AT NIGHT
I oil cleanse with this oil , its $9.99.
At the end of they day, with a regular face of makeup on, I use this oil to drench my face + neck. I don’t have a specific amount I use… I just make sure my skin is nice and covered in the product. I gently massage my face and neck, making sure it breaks down all of my makeup.
Once your make up is broken down (literally it will just smear all over your face, lol), start using warm(ish) water to dilute it. You won’t get it all off (oil + water don’t mix ;)
Now we’re going to WASH OUR FACE! I use this face wash (omg, guys it’s SO good, and lasts forever!!!!). You’ll still have oil on your skin when you start to wash your face but that’s totally fine! The oil isn’t hurting your skin. Lather. Rinse. Pat dry.
I use this toner. It is a moisture-replenishing toner that restores natural pH balance as it rejuvenates environmentally stressed skin.
I use a combination of three oils to moisturize my face, neck, and chest (listed below). I mix equal parts of each oil and put them on all at once; I don’t layer them like most skincare routines. I put a few drops of each in my palm, rub my hands together to warm it up, and use my PALMS (not fingers) to press and rub the oil….. everywhere I can.. lol! I cover my face, lips, eyes, eyebrows, neck, chest, and if there’s product leftover, or areas my skin is dry, I put it on my hands and elbows.
OILS I MIX/USE: ALL ARE NONCOMEDOGENIC MEANING THEY WON’T CLOG YOUR PORES (THEY EMULATE NATURAL OILS WE ALREADY HAVE ON OUR SKIN, NOT COMBAT THEM).
THIS JOJOBA OIL $9/99 : look familiar? That’s because this is the same oil you used earlier to cleanse your face!
HYDRATING
NUTRITIOUS: full of Vitamin E and B, antioxidants and minerals to nourish and protect skin. The vitamins also help skin repair and with damage control.
ANTI-AGING: it’s been proven to reduce superficial facial lines with consistent use (I have seen these results myself)
RECOMMENDED FOR SENSITIVE SKIN: it’s a really gentle and fast-absorbing oil
ANTI-MICROBIAL: naturally deters microbes, preventing the growth of bacteria on skin ~ helpful with acne and scaring!
THIS ROSEHIP OIL $12.95 :
HYDRATES: contains fatty acids that maintain soft subtle skin. you skin will DRINK THIS UP!
MOISTURIZES: locks in hydration which is an anti-aging property
RICH IN VITAMIN A and C which means it boosts the formation of collagen (this is essential for skin elasticity and firmness).
REDUCES INFLAMMATION
PROTECTS AGAINST SUN DAMAGE (but does not replace sunscreen, yall!)
REDUCE HYPERPIGMENTATION
REDUCES SCARS AND FINE LINES: helps with tissue and cell regeneration in the skin (it has fatty acids and antioxidants)
THIS SQUALANE OIL: $11.95 :
HYDRATING: vibrant and healthier skin
ANTIOXIDANTS FIGHT SKIN DAMAGE
DETOXIFIER
BOOSTS COLLAGEN PRODUCTION
FIGHTS FINE LINES
LIGHTWEIGHT SO IT WON’T CLOG YOUR PORES
PENETRATES SKIN AND PORES AT A CELLULAR LEVEL (BUT NOT HEAVY)
ANTI-INFLAMMATORY: reduces redness and any swelling
YOU CAN ADD TO YOUR HAIR TO PREVENT BREAKAGE AND INCREASE SHINE
I also take Nutrafol for my hair/skin/ nails!
GO TO BED :)
MORNING ROUTINE
DO NOT WASH YOUR FACE!
This is sooooo important. You just let your skin “eat” overnight. You essentially just fed you skin with a lot of yummy nutrients overnight. Re-washing your face will only un-do what you did. Seriously, don’t wash your face.
Gently splash your face with warm(ish), not hot, water. I just splash my face to get crusties (is this a word??) off.
Mist face with this toner. It is a moisture-replenishing toner that restores natural pH balance as it rejuvenates environmentally stressed skin!
Moisturize with this lotion again.
This is the SPF I use- I AM OBSESSED! It is a tinted mineral SPF that is a mattifying primer (double win)! If you want to see my Japanese sunscreen picks, see this post.
Please leave a comment if you have any questions about this routine, or if I left anything important out! If you like my simple routine, you may want to check out this blog post on my simple, No Makeup, Makeup look!
~ Caitlin
EASY PRODUCT LIST:

Japan Pet Quarantine Process
DO YOU HAVE TO QUARANTINE YOUR DOG? HOW IS YOUR DOG GETTING TO JAPAN?
I love, love, LOVE how many of you dog moms out there always ask questions and check in on my lil’ dude. I got a few messages about his quarantine process over the last few weeks, so I wanted to share a few things about the process with everyone :) (linking my Japan Q+A here which goes more in depth about our move❣️) The quarantine process is NOT AT ALL what I imagined. I thought my dog was going to be held in a cell like a sick animal with the possibility of not even being let in 😂 it sounds so scary, but the reality is, it’s been super easy!
📆 QUARANTINE (in this context), means a period of isolated time in which your animal is clear of any diseases and viruses not allowed into the country (every country is different).
🗾 Japan is strict because they are an island and have to protect their gorgeous eco-system! They actually don’t have regulations on the TYPE of dog you bring (from my understanding), as long as he doesn’t pose a threat to their ecosystem (hence the quarantine process)!
🦠 Japan’s quarantine process is 180 days - which you are allowed to start HERE in the States! You can start here because the process (like mentioned before) is just a series of shots, stool, and blood testing which ensures our little man passes their regulations.
If your dog does not complete the process by the time you are moving to Japan, your dog will be quarantined - but wait! It’s not at all what you think! If you are military affiliated, you dog is just held at the dog kennel on base until the process is done. He is still allowed in Japan, and he is still allowed on base, he just can’t leave base until the process is over. For us, Gus will still be quarantined for 2 weeks, but he’s basically at doggy-day care during that time :)
⏰ The process is a little stressful because everything is time sensitive + has to be given in a specific order, specific time window, and signed by specific people at the vet + the Department of Agriculture.
✅ We have a printout that gave us a checklist, and worked closely with our vets to make sure everything went smoothly. We adore our family at Mission Valley Pet Clinic - If you’re in SD I couldn’t recommend the wonderful women at this clinic enough!! 💞
I hope it helps anyone else moving overseas with a pet + clears up what quarantine really is! I’m happy to go more into the specifics if it would help anyone. If you have any questions or advice, please shoot them below! 🤗🤗
MOVING TO JAPAN / QUARANTINE PROCESS FOR OUR DOG. IWAKUNI, JAPAN
IF YOU WANT TO WATCH OUR Q+A WHY WE’RE MOVING TO JAPAN
MATCHA + How to order it
WHAT IS MATCHA?
Matcha is the Japanese word for “fine powdered tea.” Matcha is the result of high quality green tea leaves picked and processed to become matcha tea. Unlike traditional teas, which are steeped and discarded at the time of use, matcha leaves are directly consumed to maximize health benefits! The process of making a ceremonial grade matcha consists of mixing less than boiling water and matcha powder. You whisk them together, preferably with a bamboo whisk, to create a frothy drink that is enjoyed.
Here’s a great article comparing the different grades of matcha: PREMIUM vs CULINARY
WHERE CAN I BUY MY MATCHA?
my favorite sites are IPPODO TEA and LUPICIA (but not all of their sites have a location for ceremonial matcha). STAY AWAY from anything that says “multi-use, cooking, smoothies…ETC” in the description… this is NOT what you want in a tea. If you accidentally bought this, don’t toss it! You can still use it in other cooking things like pancakes, muffins, etc. It won’t harm you, but certainly won’t give you the benefits you’re looking for. Also, please do not buy off amazon :) Matcha should always be stored in a fridge and handled with care. I can assure you the quality diminishes by the time you get it.
HOW DO I STORE IT
FRIDGE! In an air-tight container. Don’t have one? A zip-lock will do just fine.
DO I NEED A BAMBOO WHISK
Need? No, but you should. I like this one. Try to avoid using any metal with your matcha - it actually changes the chemical properties of the tea and changes the flavor. The way the bamboo whisk is designed is 100% intentional. It is made from 1 bamboo splintered (as you can see from the link). You really should be using one to maintain tea quality AND get the frothy bubbles you’re looking for.
To clean it, just rinse with hot water and leave out to dry!
ORDERING A MATCHA
Ordering a matcha can seem overwhelming if you don’t know much about it, so let me help!
🍵 Traditional matcha consists of two ingredients: ceremonial grade matcha (this is the highest quality you can get), and 1-2 ounces of hot water! THAT👏🏻IS👏🏻IT. The portion would be a little bigger than an espresso shot. This is the base you want to look for when ordering at any shop- it’s okay to ask what grade matcha they use before ordering (I always do)!
If they have ceremonial matcha, there are a few ways you can order it:
CEREMONIAL TEA: 1-2 ounce pour
HOT LATTE: ceremonial tea + whatever steamed milk you love (my favorite is oat milk)
ICED MATCHA: ceremonial tea, water, and ice
ICED LATTE W/ MILK: ceremonial tea, water, ice, milk of your choice
Sometimes I will sweeten it myself, or add cinnamon, otherwise these are the basics :)
🌸 YOU DON’T WANT matcha if it’s a low quality product (see this article for differences)! It toooootally tastes different. Often, if a cafe carries a lower quality matcha, they mask the flavor with sugar + milk. It doesn't even taste relatively close to what you should be looking for! Save your money :) 🌸
🌴 PSA: STARBUCKS DOES NOT MAKE A REAL MATCHA; this is why so many of you message me saying you hate it + have a bad experience. It should taste floral and earthy.
make sure you’re following me on instagram!
@her.atlas


PACKING LIST: CAR CAMPING
Whether you are new to camping, or more experienced, here is everything we keep in our storage box for car camping!
** TIP! Keep all of your camping gear in clear storage boxes that clip closed. This is the exact one we use. We just grab our camping boxes out of storage, throw them in the car, and go! We make sure everything is clean + organized as we pack it up and put it away. **
Therm-a-Rest ProLite Sleeping Pad - we love ours because they fold SO SMALL , and keep us warm through the night, even if the ground is cold.
Trash bags + old Grocery bags
Snugpak Jungle Bags - these are sleeping bags we use for warmer temperatures
Camp Chair (currently 30% off!) Alite Monarch - these fold up compact, are really light/durable, and SO comfortable. You need chairs for the campsites :)
FLASH lite Jetboil - this is what you will use to boil any hot water - so many uses for coffee, tea, soups, and hot water for any camp food you may need. The fuel is sold separately, but not expensive at all.
FUEL for your FLASH lite JetBoil -you actually can’t order this online (I looked everywhere!) Go to REI and ask for MRS or or Jetboil fuel - I think it’s because they don’t want to/ can’t ship fuel. It’s not expensive - they’re about $10 each!
Yeti mugs - we use these as cups and bowls - coffee, tea, oatmeal, soups, etc. They come with lids, and I mean.. they’re Yeti, so the quality is absolutely amazing. They’re $25, but the durability can’t be compared. They are really easy to clean, which is just an extra convenient when you are camping :)
Bag of tea, hot chocolate, sugar, + spices for cooking - keep it simple!
LED collapsible lantern’s - we love these because it comes in a set of 4 for only $30. You can adjust the brightness by pulling them all the way out, or just a little. They are lightweights and great to have around for visibility around the campsite.
Spade - this is for burying your waste. If you are new to camping/ outdoor life this is really important! Make sure you walk far away from your campsite to handle your business, since animals are attracted to these types of smells.. Use biodegradable toilet paper and pack it out. I know this sounds weird to talk about, but it’s part of the experience :)
CLEAR ziplock or reusable bags of various sizes - these come in handy for random things!
Batteries for anything that needs them.
Body wipes - for those days you can’t shower, but still need to wipe off :)
Duct tape - handy to have around!
Fire starters - there’s a ton on the market!
Matches or lighter (need these for starting fires and your JetBoil)
Hatchet + pocket knife
Spare car key/ house key incase you loose one!
Colored Washcloths - we use washcloths as napkins, but they also come in hand for wiping things down, or washing you face, etc. We always have different colored ones so we know what they are designated for (example: blue for napkins, red for face wipe, green for body, etc.)
Flip flops
Sneakers
Socks
Crocs - I KNOW THEY ARE UGLY - but these are the best campsite shoes with some cozy socks! The last thing I want to do is wear flip-flops around the campsite and my feet get filthy. I also don’t want to wear my sneakers around because usually I’ve been in them all day. Trust me on this one.
Water - always take more than you think you need. You need water obviously for drinking, but you’ll need it for cooking + cleaning, too!
Snacks + food
Hydroflasks - for your personal water at all times
Hiking pack - these are some low profile ones we love!
YETI Roadie 20 Cooler - BEAR PROOF COOLER!! This is so important when camping! You should store all of your food (and anything scented) in this cooler, and store it away from your tent during the night.
TENT Marmot Limelight Tent: @ person 3- season
Sea to Summit Liquid soaps (eco-friendly)

NO MAKEUP, MAKEUP
SKIN
This leaves my face clean, but not dry. It always feel moisturized and really fresh, and even skin-tone.
CRUELTY FREE. The first toner I’ve used that doesn’t sting my skin or leave it feel irritated.
CRUELTY-FREE. This is one of the newest products I am using! I am OBSESSED with it. It leaves my skin feeling hydrated and ‘awake.’ It combats environmental factors that can damage our skin (like pollution).
CRUELTY FREE. I recently started using this moisturizer after my husband fell in love with it. It encourages cell turnover which is great for combating fine lines and wrinkles!
CRUELTY FREE. If you have combination skin, you should try SUPERGOOP poreless primer with SPF 40! I am so obsessed with this product. It’s slightly tinted so it looks amazing by itself (beach day) or layered under foundation! I’ve been using this for 2 years.
CRUELTY FREE PRODUCT: I love this non-toxic concealer! I tried a lot of different brands before settling on this. It has light-medium coverage, build-able, it doesn’t crease, and is long-lasting. I only put this under my eyes and on trouble or red spots.
BROWS
BROW GEL - THIS HAS CHANGED MY BROW GAME!
I actually got a sample size of this over the holidays and it has changed everything for me. I back-comb this BEFORE applying my brow pencil. My eyebrows look more feathery and natural. The key is to use this BEFORE the brow pencil.
Love this because it’s build-able for natural brows and I loveeeeee the angled tip!
EYES
2 coats, always! Lots of volume + length, but also build-able! I’ve used this mascara for 3 years, and I’ve tried them all! This is the best - no clumps, it’s not sticky, will stay on all day.
“EYELINER”
I use my brow pencil for my eyeliner, too! I like products that have multiple end-uses. You save money and only have to keep up with a few things. It’s brown and will smudge if I want it to (I don’t like a harsh line), but will also be a solid line if that’s what I’m into. it will stay on alllll day, even through a workout.
This is the ONLY eye-shadow pallet I use. Its the perfect balance of warm neutrals for everyday looks.
GO-TO LIPS + CHEEKS
love this for long lasting + travel since it’s like a 2-in-1; I layer with with KOPARI coconut lip gloss love this for every day - especially events since it’s long-lasting.
OR
in TULIP
ALSO OBSESSED WITH THIS LIP PLUMPER IN DOLLY
It’s matte with true brown undertones (not orange), and smells like chocolate!
My entire routine takes less than 6 minutes :) ENJOY!
WATCH ME PUT MY MAKEUP ON HERE :)

Tips for HIKING WITH DOGS
I wanted to share some tips for Hiking with Dogs! I get questions about it all the time and honestly, I see some really scary stuff on the trails! I want to spread awareness on pet safety. It’s extremely selfish to take an animal somewhere they aren’t built to handle.
Just a little background on my pup: we intentionally wanted a dog that was medium sized because we are avid hikers. We knew when we saw him he would be strong enough for the trails, but he was small enough that if he ever got hurt, I could still physically carry him if I needed to (I’m 5’3).
There’s many safety hazards for animals so unless you are a responsible adult who understands heat advisories... LEAVE YOUR DOGS AT HOME! We found out that there’s about 35 dogs buried at the bottom of Cedar Creek Falls who never made it back. This is totally preventable bc HUMANS are responsible for their pets, and ignore all warning signs during the summer heats. This makes me SICK.
SAFETY + HIKING WITH DOGS
⚠️ If you DO decide to your dog on a trail with water (like a lake, pond, stream) they can play in, DO NOT let your dog swim for a long time. Their paws get soft from the water (just like our hands). Hiking back can literally shred and rip their paw pads off from the heat and rocks... please please be careful friends!
⚠️ Easy rule of thumb: If it’s too hot for you, it’s WAY too hot for them. (They make “cooling collars” for dogs to help them dissipate heat).
⚠️ If you’re thirsty, hungry, or tired, then they probably are too. Take breaks ☺️
⚠️ Take your pup on training hikes before committing to long ones. This helps toughen-up their paw pads.
✍🏻 always check to see if dogs are allowed on the trails, and abide by the rules. Most sites will give you advisory warnings!
⚠️ always consult your vet to make sure they are up to date one their shots!
⚠️ look into getting your dog vaccinated and/ or trained for rattlesnake encounters
Do any of you have additional hiking tips for pet safety? I would love for you to share!


AMAZING HIKE NEAR LAS VEGAS, NEVADA
The Fire Wave, Valley of Fire State Park, Nevada
The Valley of Fire is about an hour away from Las Vegas, Nevada. If you get the chance while in the area, or driving by, I highly recommend taking (at least) a half day to detour through the park. It is the oldest and largest state park in Nevada, and has amazing sandstone formations! Here’s one of my FAVORITE hikes from our road trip. It was easy and leisurely, great for all ages and experiences, but most importantly it was an incredible formation!


THE FIRE WAVE

Difficulty: easy! great for all ages (my husband hiked this is crocs for reference LOL)
Location: Valley of Fire State Park (about an hour away from Las Vegas, NV)
Trailhead Address: Mouse's Tank Rd, Overton, NV 89040 OR P3 Parking lot
The Fire Wave Trailhead is located at the P3 parking lot. Once you’ve parked, the trailhead starts on the other side of the street. Is is marked with poles for you to follow and stay on the trail.
Distance: 1.5 miles round trip
Time: 1 hour out-and-back, depending on your experience/ fitness level, and how long you stop to take pictures
Trail type: out-and-back
Traffic: lightly trafficked
Best Time to visit: Cooler months are better. Be advised the summer heat is crucial, and there isn’t any shade on the trail. We hiked at 6 am before the scorching 100 degree temperatures hit, but even by 7 am, you could feel the temperatures rising.
Parking: Free! Parking is at lot P3 on the park.
Animals: Dog are allowed on the trail on a leash.
Bathrooms: N/A
Hours of Operation: Open all year
Fees/ Permits: N/A; you will pay an entrance fee to the park upon entrance, but there is no permit required for this trailhead.
Water sources: N/A There are no clean water sources on the trail. Be sure to pack a regular sized-water bottle. It is not a strenuous hike so you don’t need a lot.
Food: I don’t think you need to pack any type of snacks (unless you want to). We didn't even break a sweat on the trail.
Shade: No shade! I always recommend sunscreen and a hat!


Baja, Mexico trip and outfit Roundup!
BAJA + TODOS SANTOS GUIDE
Last week I spent 5 days in Todos Santos; a sleepy little vacation town in Baja, Mexico. It was really cute and quaint, perfect for a relaxing getaway! Here’s some of my best tips for Baja, and a few things to do!
FLYING TIPS: If you have the luxury of living near San Diego, fly out of Tiujana, Mexico! Take the CBX Bridge (more like a terminal), which was built to make our lives easier. It connects from San Diego to the Tiujana airport terminal. It costs about $30 roundtrip to use, which is worth it since flights are about half the price (or more!) avoiding international flight fees. If you fly on the airline Volaris, there’s an option to add the CBX ticket to your flight at check-in, you can book separately on the CBX website, or when you get there! Example: My flight was $220 all-in, but they were going for $650 out of SAN.
WHERE TO FLY INTO: There are two airports in Baja: La Paz, and Cabo. Both cost about the same, but depending where you want to go one is closer than the other. We stayed with a friend in Todos Santos, which is right between Cabo and La Paz, so some of us flew into La Paz, and others into Cabo. The drive was an hour and twenty minutes to get to Todos Santos from either location.
TAXI’s OR RENTAL CAR: RENTAL CAR!!! I highly recommend getting a rental car, especially if you plan on exploring outside of your town or doing any excursions. Baja is a DESERT with beach towns typically an hour apart; with nothing in between. It was actually kind of eerie, and not what I expected, lol! We didn’t see many taxis, and I imagine them to be expensive and hard to get (especially if you want to go to the beach). Everything is so spread out!
BALANDRA BEACH


The crystal clear waters of Balandra beach is near La Paz, and you have to have a car to get here. I recall seeing some tour buses, but I don’t know much about them. You HAVE to visit here if you go to Baja! One of the coolest parts are the white sands, and that the bay is entirely waist deep, so you can walk football fields into the ocean! You can bring your own snacks, but there are local vendors selling fresh fruit (like legit fresh fruit). I would plan on spending half a day here.
OUTFIT DEETS:
SUNGLASSES (on sale)
EAT AT LA ESQUINA CAFE

Shamelessly, we ate here 3/4 days of our vacation! I LOVE this place. It has so many healthy juices and food for dietary restrictions. I don’t have any allergies, but I love FRESH food, especially on vacay for a detox meal. Order: gluten free coconut flax pancakes, chia latte, the green juice, and the tostadas. They have an attached yoga studio, menus in English, suuuuuuuch cute vibes, wifi, and a huge patio! They have a schedule posted with live music and local vendor events, too.
TAKE A SALSA CLASS

We booked a private salsa lesson while in Mexico! It was SO MUCH FUN, and I wasn't half bad at it. It was about $200 for an hour, but we all split it. It was inexpensive for what we got, especially since the teacher came to us. This outfit was perfect for salsa class, and exploring the bars after :)
OUTFIT DEETS
SUNSET DRINKS AT EL MIRADOR

Our friends took us for sunset margaritas at this amazing property in Todos Santos. El Mirador is cliffside overlooking the ocean; it was my favorite spot in Todos Santos! It’s a restaurant, but depending on your budget, you may want to go here just for drinks like we did! You need a car to get here. Order the Hibiscus marg :)
OUTFIT DEETS
MARGS at TEQUILA’S SUNRISE BAR

This spot is famous in Todos Santos for their made-from-scratch margaritas. It’s their claim to fame! This is geared towards tourism, for sure. The staff spoke English, and the drinks cost just as much as they would in the states, however they are d-a-n-g-e-r-o-u-s. DAY DRINK AT YOUR OWN RISK. I’m a margarita snob, and these were worth every penny. I had one-and-a-half, and thats all I needed! They’re basically tequila on the rocks.. LOL!
OUTFIT DEETS
SHORTS (I have these in 3 colors;
they’ve changed the buttons, but the fit is the BEST)
EXPLORE DOWNTOWN TODOS SANTOS

I loved exploring the streets of Todos Santos! There’s so many local restaurants and cafes!
OUTFIT DEETS
MY FAV!! COTTON ROMPER
Thanks for stopping by, let me know if you have any questions :)
Never Stop Exploring, xX Caitlin
@her.atlas

The Best Beach Hike in San Diego, California
Ho Chi Mihn trail is located in a residential neighborhood in La Jolla, Ca. This is one of my favorite beach access hikes to do in San Diego! Every few yards, the trail environment changes, just be warned: it isn’t for everyone. This trail is not for small children or the elderly. It is steep, slippery, and requires repelling at the end!
Ho Chi Mihn trail is a ‘secret’ surfer entrance through a neighborhood. As you hike, you will undoubtedly run into them carrying their boards up and down to the beach (if you get lost, just follow them… the trail is NOT marked).
Difficulty: moderate-difficult / experienced
Location: La Jolla, San Diego, California
Trailhead Address: 9883 La Jolla Farms Road, La Jolla, Ca, 92037
The trailhead is REALLY easy to miss if you aren’t paying attention. When you get to the trailhead access, you should see a few cars parked. The trailhead access is between two brown/ medal fences that belong to private properties. At the street entrance you will see a brown sign mentioning heat and animal warnings; follow that down, you’re going the right way! At the bottom of the first hill, make sure you cross this plank (pictured below) so you know you are going the right way.


Distance: 2.4 (ish) miles round trip
Time: 1-2 hours out-and-back, depending on your experience/ fitness level, and how long you stop to take pictures
Trail type: out-and-back
Traffic: Light - Moderate
Best Time to visit: Year-round
Parking: Free, 2-hour parking on the street!
Animals: Dog are allowed on the trail, but not on the beach. I don’t recommend taking ANY pets the first time you attempt this trail. You will be crawling at some points!
Bathrooms: N/A
Hours of Operation: Open all year
Fees/ Permits: N/A
Water sources: N/A There are no clean water sources on the trail. Be sure to back a regular sized-water bottle. It is not a strenuous hike so you don’t need a lot.
Food: I advise you eat before going and having some kind of fruit (banana, orange) and/or a protein bar to enjoy on the beach!
Shade: The hike is through a canyon so there’s bits of shade, but nothing is covered 100% of the time. I always recommend sunscreen and a hat, especially if you plan to walk along the beach.

The Trail is dog friendly, but the beach is NOT. I only recommend taking your dog on this trail if you have done it before.

Typically an empty beach other than the surfers.


Here is a poor quality photo of the ropes for repelling at the end. It is a relatively short distance, but is especially slippery after it rains. The ropes are often replaced because they are used so frequently and wear out. My advice is to go slowly backwards, but don’t put too much weight on the ropes, they can break!


Give the Gift of Adventure!
You can also shop my amazon guide, here’s the link: Caitlin’s Amazon Adventure Gift Guide
TRAIL SHOES
MUDCLAW 300

TRAILTALON’S 235
I hiked Half Dome in these!

OUTWEAR

PATAGONIA PULLOVER
ASKING FOR THIS AS A LAYERING PIECE

LULULEMON
ALL THE RIGHT PLACES PANT ||
I OWN ABOUT 4 PAIRS OF THESE EXACT PANTS. GREAT FOR HIKING, AND HAS POCKETS FOR HOLDING YOUR PHONE ON THE TRAIL

NORTH FACE VEST
PART OF THE SALE AT NORDSTROM, LOVE THIS COLOR FOR THE TRAILS AND GOING TO THE GYM

ROKWOLF TOP
LAYOVER LONG SLEEVE FOR LAYERING AND LONG CAR RIDES
WAS $56, NOW $42
BAGS

OSPREY TEMPEST 20 HIKING BAG
THIS IS A GREAT BAG FOR BEGINNERS AND INTERMEDIATE HIKES!
WAS $110, NOW $81.99

OSPREY PORTER 46 TRAVEL BACKPACK
THE ONLY DURABLE CARRY-ON AND WEEKEND BAG YOU NEED.
WAS $140, NOW 104.95

TALON 22 HIKING PACK
GREAT FOR BEGINNERS, AND INTERMEDIATE HIKES
WAS $110, NOW $81.95
ACCESSORIES

GARMIN VIVOACTIVE 3
GPS SMARTWATCH WITH CONACTLESS PAYMESS AND BUILD-IN SPORTS APPS
WAS $270, NOW $199

INVISI BOBBLE
THEY WON’T BREAK, DAMAGE, OR CRINK YOUR HAIR! MY FAVORITE HAIR TIES OF ALL TIME!

HYDROFLASK
INSULATED CONTAINER TO TAKE.. EVERYWHERE! SO MANY SIZES AND COLORS FOR ENDLESS OCCASIONS.

Travel Credit Card Tips & Tricks
✅ MAXIMIZE YOUR CREDIT CARD POINTS
✅ UNDERSTAND HOW TO USE THE PORTAL
✅ DOUBLE DIP FOR EXTRA POINTS
✅ DON’T DO ANYTHING FOR FREE
Are you interested in getting a travel credit card, but are overwhelmed/ intimidated by ALL the options? Do you currently have a credit card, but aren’t sure if you’re maximizing your points?
I’m going to tell you a few things I've learned this year with my FIRST travel credit card, Chase Sapphire Preferred.
Before we get into tips/hacks, I by no means encourage anyone to get a credit card who doesn’t understand how they work. Here are the top rules of responsible credit card usage that ARE MY BIBLE (I’ll remind you of these at the end)!
NEVER buy anything you can’t pay cash for right then and there. EVER.
It’s simple! If you can’t afford it, don’t buy it.
NEVER max out your card.
You only want to keep a balance that is 50% or LESS of your credit limit. If your limit is $2,000, and you spend $2,000, it doesn't look good to the credit card companies. You want to keep some type of balance (but obviously pay it off) without maxing it out.
ALWAYS pay your balance, every month, on time.
This tells the credit card companies that you will borrow their money and pay them back ASAP. This helps your credit, allows you to have higher limits in the future, and avoids interest charges.
NEVER use your credit card to make ends meet.
If the reason you want a credit card is to help you out of a bad situation, this will only make it worse.
Check your credit card statement REGULARLY.
Make sure you are aware of your spending and any fraudulent activities. Credit cards don’t require pin codes, and can be used anywhere.
DO make purchases you ALREADY make.
Make purchases on things that you would be buying ANYWAY. Don’t change your lifestyle by living above your means just because you have new plastic!
Extend your credit limit annually or bi-annually!
It doesn't cost anything or harm you by doing this EVER. If you only get approved for a $2,000 credit limit, in two years it could be extended to +$15,000 if you use it responsibly. My credit limit has tripled in a year because I use it correctly. I have the same spending habits I had a year ago, but my limit keeps extending.
EXAMPLE: Let’s say I only spend $20 on my credit card each month. Last year my limit was $100. I consistently spent and paid off that $20 each month. The next year I ask them to extend my limit. They see I have a good reputation, so they extend my limit to $500, then $1,000 the following year. I’m still only spending $20 a month on my credit card (the gap keeps getting bigger). This practice is crucial when you want to make a big purchase in the future. (see below when we bought our jeep!) Just because the credit limit is there NEVER means you should be using it!
MY FIRST CREDIT CARD: CHASE SAPPHIRE PREFERRED
A year ago I decided to get a credit card, and was overwhelmed with the options (which is why I’m sure you’re here). I did research on the internet, asked co-workers, friends, family; I dug deep, so you don’t have to. I didn’t want anything complicated, with a ton of fees, or a secret interest rate in the fine print. I just wanted something simple, easy, idiot proof (lol), and R-E-W-A-R-D-I-N-G! I’m writing this to tell you that if you are considering an entry-level credit card, Chase Sapphire Preferred is your answer (it was mine!).
They kept it simple, and easy to understand.
Current offerings when you use my referral link: New customers earn 50,000 BONUS points after you spend $4,000 on purchases in the first 3 months from account opening. — that's $625 toward travel when you redeem through Chase Ultimate Rewards® on top of the points you already get for each purchase.
BENEFITS!

EASY TIPS/ TRICKS to MAXIMIZE POINTS!
💸 TRAVEL: My points are worth 25% more in travel redemption. This means that if I have 25,000 points ( = $500) sitting on my account, and decide to use them towards travel, Chase will recognize the points at 25% more (31,250 points, or $625)! I always use my points for travel because that’s where this Chase Sapphire Preferred is most maximized.
💸 SHOPPING HACK: PAY ATTENTION… Another way to earn extra points for travel/shopping is by purchasing your flights, hotel, shopping online, THROUGH your Chase Sapphire Preferred portal. EXAMPLE: I use a general travel site, I will only get +1 Point per $1 spent. HERE’S THE HACK: by purchasing a flight through my chase portal, I usually get EXTRA points. This goes for almost other shopping you do! Shop on AMAZON? Sears? Do it all through your portal first, to get points on top of points. DOUBLE DIP AND MAXIMIZE THAT ISH! Most people don’t know this feature exists, or take the time to go through the portal :)

Check that out! If I was going to shop at Neiman Marcus, their offering 3 PTS per $1 spent, and Kiehl’s is offering 6 PTS per $1 through the portal. If you’re an online shopper ANYWAY, be sure to check your portal, first. There’s a lot of other familiar stores like ASOS.com and Levi’s, Home Depot, etc.
💸 ALWAYS PAY AT THE RESTAURANT!! Out with a group of friends? EVEN BETTER! I always snatch the bill and make everyone Venmo me :) So many benefits… you get extra dining points, it saves the waitress a headache splitting the checks, AND I get to make sure he/she gets 20% gratuity (gratuity counts towards your points at dining! :)
This can be applied to many things! At this time in life, I’m constantly going on destination birthday trips and bachelorettes. I always offer to book the hotel, concert tickets, restaurants, airbnb’s, etc. so I get the points on these big purchases. There is a sense of responsibility that comes with it (tracking everyone down to pay you), but that little work is worth it when you get kicked back a bunch of points :)
💸 PUT EVERYTHING ON YOUR CREDIT CARD… as long as you can pay cash for it right then and there! Start off by putting your normal, non-negotiable expenses on your credit card. You are already paying for gas, groceries, a gym membership, you might as well be getting credit for it! Anything you have drafting from your debit card, or things you ALREADY spend money on. Keep it simple before going for it (I currently ONLY use my credit card. I refuse to use my debit card for anything. now).
MY FAVORITE ADVICE FROM YOU!

@victoriafrena_
“…I negotiated a credit card fee reduction my second year and Right before m third year I downgraded that credit card to a freedom card which has no cost and opened up the reserve to get even more points”

@traveltartare
“It’s my favorite card so far! Made this trip (traveling for a year around the world) so much better for us!… get into the lounges (at the airport), it’s the BEST! That’s the card I used to get priority pass lounge access! Go to the benefits page on Chase website. It’s instant, quick, and easy.”
@joannabertram : “Shop around for credit cars! I have different cards that give me different different amount of points for different things. EX: I have a credit card I only use for gas bc it gives me 4% back!!! Obviously you… want to have a few & use them to buy what gives you the most points/cash back for that card… Also set up email or text purchase notifications can really help protect agains fraud. REMEMBER: Also, like most things, the right credit card combo is going to be different for different people. IT really depends on what you spend your money on.”
BIG PURCHASES WE USED OUR CREDIT CARD FOR TO MAXIMIZE POINTS WITHOUT BEING IN DEBT
💸 WE PAID FOR OUR WEDDING without being in DEBT. Last year, my husband and I paid cash for our wedding. ZERO DEBT. As soon as we got engaged we started aggressively saving. Once we knew bigger purchases were in the near future, I applied for this credit card. We needed to spend $3,000 in the first 3 months to get back $1000 (promo at the time). We put everything for the wedding on the CC, and paid it off immediately!! This is a strategy we will always practice, and I encourage you to abide by. We were spending the money ANYWAY, so why not get rewarded for it? We EASILY hit our mark, and bought flights to Hawaii with the vouchers we got!

💸 SPONTANEOUSLY BOUGHT PLANE TICKETS TO JAPAN without being in DEBT. I went through the portal on Chase.com, and saw that I had $200 in travel points to use. The points accumulated just by using my credit card for normal purchases at the gas station, grocery store, and my gym membership. The flights were already cheap, but I got a extra points a few ways:
1.) Used my points to get $200 off total purchase
2.) I EARNED points just by purchasing the flights on my CC
3.) I earned EXTRA points by going through the portal instead of a regular airline
4.) I still got my loyalty flyer points through American Airlines
So.. YAAAA, we’re going to JAPAN ON FRIDAY!!
💸 WE USED OUR CREDIT CARD TO PUT A DOWN PAYMENT ON OUR JEEP, then we paid it off immediately (literally swiped my card then paid it off before we walked out of the building) ZERO DEBT. Earlier in the post, I talked about credit limit extensions and how they are important over time. Because I was able to keep extending my limit, we were able to use my credit card to put the down payment of our jeep on it. Had I not practiced good responsibility and loyalty to my Credit Card company, they would have never extended my limit! This was a huge purchase we planned ahead of time; we saved, we didn't use it to make ends meet. We did it because it was strategic, and earned a SH!T ton of points this way… :)
QUESTIONS FROM INSTAGRAM
Does the card you use have an annual fee?
YES! It was waived the first year. Now it is $95 a year. To be honest, using my card regularly for everyday expenses like gas, groceries, bills, gym membership, pays for the annual fee, easily!
What card do you have?
CHASE SAPPHIRE PREFERRED (for now :)
What in the heck did you mean when you said double dip?!
Going through the portal to make your purchases! You will get points for the purchases, and additional points for using the portal!
Any negatives to signing up?
I haven’t experienced any!
let’s revisit my (and hopefully one day, YOUR)…
CREDIT CARD BIBLE
NEVER buy anything you can’t pay cash for right then and there. EVER.
NEVER max out your card (this also show’s you’re responsible).
ALWAYS pay your balance, every month, on time.
NEVER use your credit card to make ends meet.
Check your credit card statement REGULARLY.
DO make purchases you ALREADY make.
Extend your credit limit annually or bi-annually!
💸 💸 💸 💸 💸 💸 💸 💸 💸 💸 💸 💸 💸 💸 💸 💸 💸
Earn 50,000 bonus points with Chase Sapphire Preferred. I can be rewarded too if you apply here and are approved for the card. Learn more.
MY REFERRAL LINK!!
https://www.referyourchasecard.com/6A/PXSTA7J3N0
💸 💸 💸 💸 💸 💸 💸 💸 💸 💸 💸 💸 💸 💸 💸 💸 💸
See you soon, guys! I’m off to Japan!!
xX, Caitlin

Harumama | SD Eats
Want to know where you can eat the CUTEST food in San Diego? Look no further than Harumama Noodles and Buns.


Located in Little Italy (or as I like to call it EATaly), Harumana makes meals that are both adorable and delicious!
Their creative kitchen offers a variety of sushi, noodle dishes, and character-based steam buns for your choosing (made daily in limited quantities). I’ve had the same waiter twice, Mike, whose friendliness and knowledge of the menu is one of the reasons I keep going back.
Parking in Little Italy can be a challenge depending on the time of day, but if you stay focused you can likely score a spot on the street (valet parking in the local area is always an option for impatient people like my husband ;) )


The casual space is perfect for a first date or small group gatherings, with menu prices ranging from $4-13.

What we ordered:
1 Me-So-Hot! Ramen
2 orders of character buns (Totoro: savory/Pooh Bear: sweet)
1 Salted edamame
1 Caramelized eggplant (a MUST!)
1 Ozeki Izeko sparkling jelly sake; it’s a gelatin sake cocktail recommended by my waiter, Mike
1 Iced tea
Final bill: $55,
Result: two comfortably full and satisfied patrons :)
The menu accommodates vegetarian, vegan, and gluten free options.
Address:
HARUMAMA SD
1901 COLUMBIA STREET, SAN DIEGO, CA, 92101
xX, Caitlin
San Diego | ULTIMATE GUIDE
Hey guys! This is soooo long overdue; I feel more and more relieved with each strike of the keyboard! I get a lot of direct messages on my Instagram about visiting San Diego, and I usually find myself too overwhelmed to answer; it’s impossible for me to put into a message all the beauty you will discover here. In an effort to answer direct questions from some of you, as well as give a general snapshot to those in the beginning stages of trip planning, I'm going to break down WHEN to come, WHERE to stay, WHAT to see, and WHERE to eat. Let's do this!
WHEN TO COME
There really is no BAD time to visit San Diego, as our weather is consistently beautiful year round, but if you have the luxury of tailoring your vacation to certain time of year, let me give you some advice to avoid the crowds!! I have an entire blog post HERE to help you plan your visit :)
When to Visit San Diego Blog Post
HOW TO GET AROUND
I highly recommend using GETAROUND if you are visiting San Diego. GETAROUND is like Airbnb, but for your cars. There are means for public transportation in San Diego, but if you are reading this blog post, you likely want to escape the city for a bit (and possibly do some hiking). GETAROUND allows you to rent a car on a need-be-basis. Instead of committing to at least an entire day, you can commit to as little as 1 hour for $6 (depending on vehicle). Use this link to get a $50 credit towards your first rental :)
LimeBikes + Scooters - an easy way to get around downtown San Diego, or explore the surrounding neighborhoods are through the city bikes and scooters. Popular apps used are LimeBike, Bird, and Lyft has some around town, too!
WHERE TO STAY - CITY vs BEACH
Did you know that downtown San Diego doesn't have actual access to the beach? If you look at a map, it is a bit misleading; Downtown is located right on the water, but it is the San Diego Bay, not Pacific Ocean, and there aren’t access points for swimmers. Choosing between staying at the beach or downtown is a personal choice. I hope the following breakdown makes your decision easier!
DOWNTOWN ~ CENTRAL TO EVERYTHING
The Gaslamp District is the most popular neighborhood downtown. Known for its nightlife and plethora of restaurants, this is a great place to stay for a city experience! If you are interested in a more authentic downtown experience, look into Little Italy (it’s my faaav!!!). It is a quaint, bustling neighborhood filled with restaurant patios, wine bars, and a fantastic farmers market on Saturday :) I'll touch more on neighborhoods in a later post!
Perks of being downtown:
15 minutes from EVERYTHING ~ you won't need to rent a car
Near the airport
Limebikes ~ city bikes and scooters you can rent for $1 an hour to get you around the city (wear a helmet!)
Petco Park-home of the San Diego Padres MLB team
Walking distance to amazing restaurants, pubs, views, and the bay
Trolley ($2.50 each way or $5 day pass)
BEACHES, PLEASE
Why vacation in Southern California if you can't go home with a tan?! If your ideal San Diego vacation includes waking up to waves crashing, local coffee shops, and people-watching on the boardwalk, then our beach towns may be more your speed!
CORONADO ISLAND ~ 14 minutes to airport
OCEAN BEACH ~ 9 minutes to airport
MISSION BEACH ~ 11 minutes to airport
PACIFIC BEACH ~ 18 minutes to the airport
BIRD ROCK ~ 21 minutes from airport
LA JOLLA ~ 21 minutes from airport
WHAT TO SEE
READ CAREFULLY! I've included pro-tips for each of these ;)
WATCH THE SUNSET FROM SUNSET CLIFFS - With it’s rigid and shear cliff faces, this is one of the most famous and beautiful spots in San Diego. It's a common location for proposals, photo shoots, social gatherings, and picnics. It's 15 minutes from downtown by car/uber with free street parking. (P.S. alcohol is prohibited at all beaches!)
Use this address to get you there:
1100 Sunset Cliffs Blvd
San Diego, CA 92107
HIKE TORREY PINES STATE NATURAL RESERVE - This is my favorite hike in San Diego! What I love most about the reserve are the rare pine trees, unique landscapes, beach access, and (omg) the views! Torrey Pines is located north of La Jolla, so I recommend grouping the two into a single day trip (25-30 minute drive from downtown).
PARKING: There are three ways you can park to enter Torrey Pines. I always park at Torrey Pines State Beach because it is free to park, and free to walk in the reserve; the strip is located along the beach right before the park entrance. Your next option is to enter the park, and pay a $15-20 fee (depending on the season) per vehicle. There is parking by the front gate, OR you can drive to the top (we usually do this with our parents) and park near the museum shop.
PADDLE BOARD/KAYAK THE COVES IN LA JOLLA- Watch out for Sea Lions! My husband and I went through a company called Everyday California (located in La Jolla), and had an amazing 2-hour experience. They are on Groupon!

SUNNY JIM SEA CAVE IN LA JOLLA - Sunny Jim is located in an old convenience store-turned-museum-souvenier shop, called the Cave Store. They claim that this building was used as a cover during the prohibition to smuggle in alcohol and drugs from Mexico. There is a man-made tunnel from the store through the ground that was carved out over 1902-1903. The entrance fee is $5-10 (seasonal), and the man-made tunnel down can be slippery with 145 steps to the bottom. This is the only sea cave in California that you can enter by land!
The secret swing is also near here if you can find it ;)
LA JOLLA SEA LIONS - The sea lions are a great attraction for all ages. I park anywhere from La Jolla Boulevard to Pearl Street. To see the sea lions, start at Sunny Jim cave then walk along the coastline. As you pass the beautiful Clam Cave on the right, you will shortly hear (or smell!) the reason for your visit. Although there is nothing to keep you from walking right up to wildlife, I keep a safe distance; they are unpredictable, especially the mother’s with young sea lion pups and the bull males, easily identified by the lump on top of their head!

THE WORLD FAMOUS SAN DIEGO ZOO - Don't shrug off the zoo, PLEASE! I'm telling you, you've never been to a zoo like the World Famous San Diego Zoo; it absolutely lives up to its’ reputation. Your ticket includes free parking and an aerial tram ride (Skyfari) with breathtaking views of downtown. PRO TIP: if you go on a Sunday morning, you can enjoy a boozy brunch at Alfred's treetop restaurant! BRUNCH AT THE ZOO!!! Who doesn't enjoy animals with a buzz? The zoo serves beers from our local breweries like Coronado Brewing, Stone, and Ballast point around the park for you to enjoy. Also- get the kettle corn, it's our fav!

EXPLORE BALBOA PARK - Balboa Park is like our 'Central Park.' It’s location is central to the city and has a variety of attractions including: museums, the San Diego Zoo, golfing, art exhibits, festivals, and gardens. My favorite areas to explore are the Spanish Village, Cactus Garden and the Botanical Garden (which are all next to each other). The Spanish Village is the local arts district., you’ll want to visit during normal business hours so you can see all of the incredible work on display (or buy!). It is known for their rainbow buildings and cobblestone courtyard! The Botanical Garden is absolutely STUNNING! Go to the Cactus Garden around sunset, if you have time. It's a great showcase and appreciation of the beauty found in the desert. All of these are free to do, and have free parking!
LITTLE ITALY FARMER'S MARKET - Saturday’s 8 a.m. - 2 p.m. This is the BEST farmer's market in San Diego. If you're looking for local goods, coffee, and snacks, this is where you need to be. Go to the Guac Shack and order a walk-and-guac ($5 for a generous portion), and ask for the Gringo and Macho dip combo!
EXPLORE PACIFIC BEACH - Quintessential beach town! I love Pacific Beach (or, 'P.B.') for everything it embodies. This is where you want to be for a fun beach day, margaritas, street entertainment, murals, açaí bowls... the whole nine yards! This is where Shore Club and Crushed are (see below). My husband and I have spent a few days sipping margaritas on the board walk in the sunshine and it's the best!!
HIKE COWLES MOUNTAIN - the highest point in the City of San Diego! This is a moderately strenuous hike and highly trafficked. Go early in the morning, or at sunset for the best views and more comfortable temperatures. You can easily finish this hike in regular sneakers.
HOTEL DEL CORONADO - Free parking on Ocean Boulevard along the beach. I park on the beach then make my way towards the back of the hotel, where you can see the famous yard and rooftops of the Hotel Del Coronado. You are free to walk around and explore the grounds of the hotel - don't be shy! They have a small museum just past the lobby. Try to find the hidden ballroom with massive crown chandeliers! I don't recommend staying for drinks or food unless you plan to spend some money. I DO recommend their creamery because they have excellent ice-cream. If you are in San Diego in December, you need to go to the hotel for their ice-skating on the beach!
OLD TOWN San Diego - live music, margaritas, cool shops, and history! This is colonial San Diego, and is very fascinating (and haunted!). I like going in the afternoon (2-3p.m.) to visit and explore the museums, then stay for dinner to enjoy live music. They best courtyard is between Fiesta Cocina/ Temecula Oil Company with dreamy outdoor lights.

TAKE A FLAGSHIP BOAT TOUR - They offer bay/whale watching tours (there are different options), and Groupon sells ticket for half the price! Only do whale-watching if you are here in the spring (migration season). The Flagship bay tour has a rooftop bar with normal priced drinks (yay!). I prefer the 2-hour tour because you get great views of Coronado Island, Downtown San Diego, and Point Loma.

GO TO A PADRES GAME - They may not win, but the craft beers and bites are worth every penny! You can easily get tickets at the counter on game day - PRO TIP: ask for a view of downtown :) If hot dogs and beer aren't what you are looking for, they have a great selection of organic and healthy options which is unique to our stadium.
USS MIDWAY - an aircraft-carrier-turned-museum that is open to the public. It is located downtown on the bay, with spectacular 360 views on the top deck. They have their own parking lot that costs $10 for a day pass (worth it because parking in this area is competitive). I would recommend at least 3 hours for this activity.
WHERE TO EAT
BUONA FORCHETTA for ITALIAN FOOD - you can't leave without ordering the the NICOLA PIZZA (truffle oil, fresh mozzarella, and mushroom... you can thank me later). Get here BEFORE they open at 5p.m. for dinner (also open for lunch), because the wait can be up to 3 hours, and they don't take reservations. This is the type of Italian food you will tell your grandchildren about!!!
CRUSHED in Pacific Beach for the MIMOSA FLIGHTS - I canNOT say enough amazing things about them. they'll legitimately change your life...or at least your day ;) (also the soyrizo fries)!! Great for brunch, tapas, and sharing.


SHORE CLUB for the REDBULL TROPICAL SLUSHIES - This is where I take my friends when we want to day drink on the beach! Casual, beachy, and a very social spot.
MISTER A's for HAPPY HOUR - Monday through Thursday from 3-6 pm with jaw-dropping views of downtown San Diego

THE FISH MARKET/ TOP OF THE MARKET - fresh seafood on the water, and homemade margaritas!
BALLAST POINT LITTLE ITALY - aside from all the amazing beer, they also have THE BEST truffle fries in San Diego
WATERFRONT LITTLE ITALY - DIVE BAR.. cheap beer, free popcorn, packed house!
CAFE GRATITUDE for the NACHOS, omg. so good. This is an amazing vegan restaurant in Little Italy, that serves up the most flavorful and colorful food. Definitely don't leave without ordering the nachos and a smoothie.

JAMES COFFEE, CO - VANILLA LATTE or DIRTY CHIA this is actually the best coffee you'll ever have...in my not so humble opinion


HARUMAMA, SD - the CUTEST character steam buns EVER!!!! you must go and get the jelly sake, too :)
READ HERE for Harumama Blog post
S3 COFFEE BAR - rainbow lattes, and ombre matcha late! they also have an insane avocado toast
DON CARLOS TACO SHOP - AUTHENTIC. STREET STYLE. REAL. MEXICAN FOOD in La Jolla! You canNOT come to San Diego without having tacos from a hole-in-the-wall joint, where someone's mom is cooking you fresh taco's made to order, and serving Mexican Co-ca-cola!
LOLA55 - A new and adorable Mexican fusion restaurant in East Village. Order the Lola Margarita and the Civiche.


FAIRWEATHER - This is a tiki bar for the fair-weather fans (a sports joke). With a great view of the ballpark, you can enjoy the game without actually going to the ballpark. BEST PINA COLADAS IN TOWN!
FAV PODCASTS | 9.11.18
I reached out over IG to get your favorite podcast recommendations for a road trip and they were SO good I had to share!
I tagged everyone who helped me survive my 7.5 hour car ride.
I OWE YOU!!
True Crime/ Murder/ Mystery/ Paranormal
WINE AND CRIME ~ @melissateel
SERIAL ~ @hanparey, @lizstout30
CASE FILE ~ @ctarumoto
AND THAT’S WHY WE DRINK ~ @yas_mirza
MY FAVORITE MURDERER ~ @cleangreennfit @khalletd
TEACHER’S PET ~ @ctarumoto
S-TOWN
Personal Journals/ Comedy
COUPLES THERAPY ~ @nikkiash86
BY THE BOOK~ @nikkiash86
ARMCHAIR EXPERT ~ @meredithortiz4 @ctarumoto
DIRTY JOHN ~ @steenabobeana
THIS AMERICAN LIFE ~ @lilyk
JOE ROGAN ~ @sarahjloughman, @hurricanehunter
Business
PLANET MONEY ~ @hurricanehunter
HOW I BUILT THIS ~ @steenabobeana, @ctarumoto
Society/ Culture / Tech
THE BUTTERFLY EFFECT ~ @steenabobeana
TED RADIO HOUR ~ @megawing9
REVISIONIST HISTORY ~ @lisathefiesa
RADIO LAB ~ @lifeewithlo
UP FIRST ~ @hurricanehunter
STUFF YOU SHOULD KNOW ~ @khalletd
Pop Culture/ Comedy
OFF THE VINE ~ @alliejeanfitness
THE MORNING TOAST
GIRLS GOTTA EAT ~ @therealday_z
Health/ Wellness
THE GOOP PODCAST ~ @lilyk
THE HIM & HER PODCAST
Did I miss anything good? Comment below your favorite podcast!!
xX, Caitlin
6 ECO-SWAPS FOR YOUR HOME (EASY!!)
50 percent of the plastic we use, we use just once and throw away.
In no way, shape, or form, do I consider myself to be an expert on recycling, sustainability, or saving the environment. People will never be as careful with their waste as they should be, but if you're willing to make SMALL changes to your daily routine, this list will be useful to you! Let’s keep it simple and start with things we already use everyday.
This list addresses normal things in your life you can easily swap!
You can use this link (no code needed) to get your first months subscription at Mightynest for $3! Or you can go to their site and use code HERATLASFIX to get your first MightyFix for $3. You will get Bee's Wrap as your first Fix. We were gifted a subscription to Mightynest by my mother in law, loved it SO MUCH, I reached out to get you codes, too! Each month they send you a new eco-swap to try! You can also shop their site for any household needs to add to your fix :) We LOVE them!
MICROFIBER TOWELS
Instead of paper towels, we are buying washable rags! By changing your habits to washable rags, you are helping reduce the amount of paper waste and deforestation. Paper towels are quickly disposed of after one use. I also find these clean way better, tbh!
We just got these microfiber hand towels, which are useful for cleaning up liquids, dusting, washing counters, cleaning mirrors, and drying off our hands. I bought them in black so that they look less dirty while cleaning than traditional white.
They sell them in multiple colors which are great for different ended uses (example: black for kitchen, blue for bathroom, red for random household).


BIODEGRADEABLE & METAL STRAWS
A lot of places are banning plastic, including straws (yay!)! I bought disposable paper straws for going out to eat (restaurants do not carry them anymore), and metal straws for the house. Honestly, I don’t like them that much, and have just started asking for NO STRAW. I wanted to include these options incase you really love using a straw and wanted an alternative.
By using biodegradable or reusable straws everyday, you are helping to reduce plastic waste.
LINK: DISPOSABLE PAPER STRAWS (pack of 250)
LINK TO MY FAVORITE: METAL STRAWS

HYDRO FLASK
Hydroflask water bottles are AMAZING. If you haven't heard of them, you might just be living under a rock, lol! I take mine everywhere, and own multiple different sizes/colors.
These keep your drinks hot for 12 hours, and drinks cold for 24 hours (at least). You can use them for home-made or to-go coffee (ask your barista to put your coffee in your hydro flask!), soups for lunch, water for the gym, etc.
I take mine empty to the airport and fill it up once I'm through security so I don't have to spend money on overpriced bottles of water.
Not only are you saving money, but you are saving the amount of waste from plastic water bottles.
LINK: HYDROFLASK


STASHER BAGS
Instead of plastic ziplock bags, try out reusable silicone bags! The obvious… you will be wasting less plastic. One of the benefits is also financial: you will be saving money by not purchasing ziplock bags anymore - whatever your motivation is!! These are great for meal prep, packing lunches, travel.. everything! 100% pure platinum food-grade silicone is safe for the freezer, microwave, dishwasher and boiling water. Unlike plastic bags, Stasher bags contain no petroleum, no PVC, and no latex (yay!) We have these and are OBSESSED!! I have tried these on amazon, and they were just “okay.” Stasher bags are honestly worth the investment because they are WAY easier to seal closed.
Get your Stasher bags HERE
Compact Fluorescent Lightbulbs (CFL's) use 50-80% less energy, but produce the same amount of light. Although they are initially more expensive, in the long run they cost you less on your energy bills, and last more than 8 times longer than traditional lightbulbs.
Get your CFL's HERE
TRASH DIVIDER
Trash can / recycling bin. One of the things that helped us the most was having trash cans around that are separated already. It makes the separation process seamless. We got ours here in Japan / They came with the house. I have friends who have this bin and they love it!
Here’s another option that’s more wallet friendly.

22 OFFENSIVE FACTS ABOUT PLASTIC POLLUTION
(from ecowatch.com)
In the Los Angeles area alone, 10 metric tons of plastic fragments—like grocery bags, straws and soda bottles—are carried into the Pacific Ocean every day.
Over the last ten years we have produced more plastic than during the whole of the last century.
Enough plastic is thrown away each year to circle the earth four times.
We currently recover only five percent of the plastics we produce.
The average American throws away approximately 185 pounds of plastic per year.
Plastic accounts for around 10 percent of the total waste we generate.
The production of plastic uses around eight percent of the world's oil production (bioplastics are not a good solution as they require food source crops).
Americans throw away 35 billion plastic water bottles every year (source: Brita)
Plastic in the ocean breaks down into such small segments that pieces of plastic from a one liter bottlecould end up on every mile of beach throughout the world.
Annually approximately 500 billion plastic bags are used worldwide. More than one million bags are used every minute.
46 percent of plastics float (EPA 2006) and it can drift for years before eventually concentrating in the ocean gyres.
It takes 500-1,000 years for plastic to degrade.
Billions of pounds of plastic can be found in swirling convergences in the oceans making up about 40 percent of the world's ocean surfaces. 80 percent of pollution enters the ocean from the land.
The Great Pacific Garbage Patch is located in the North Pacific Gyre off the coast of California and is the largest ocean garbage site in the world. This floating mass of plastic is twice the size of Texas, with plastic pieces outnumbering sea life six to one.
Plastic constitutes approximately 90 percent of all trash floating on the ocean's surface, with 46,000 pieces of plastic per square mile.
One million sea birds and 100,000 marine mammals are killed annually from plastic in our oceans.
44 percent of all seabird species, 22 percent of cetaceans, all sea turtle species and a growing list of fish species have been documented with plastic in or around their bodies.
In samples collected in Lake Erie, 85 percent of the plastic particles were smaller than two-tenths of an inch, and much of that was microscopic. Researchers found 1,500 and 1.7 million of these particles per square mile.
Virtually every piece of plastic that was ever made still exists in some shape or form (with the exception of the small amount that has been incinerated).
Plastic chemicals can be absorbed by the body—93 percent of Americans age six or older test positive for BPA (a plastic chemical).
Some of these compounds found in plastic have been found to alter hormones or have other potential human health effects.

HOW NOT TO DIE: HALF DOME
HALF DOME: One of the major hikes you should do before you die, but don’t die doing it!
The way I see it, you are here for one of two reasons: you either want to experience the majesty of hiking Half Dome yourself …or you are here because you want to know what the hell I got myself into last weekend!!!
If you want help planning your own trip, I’m here to prepare you for a safe, fun, and crazy adventure. If you are here for the second…truth is, I've been wondering the saaaaame thing…

If you have never heard of Half Dome, but are dying (haha!) to get that IG pic between cables on the granite rock face; you've come to the right place. My purpose with this post is to both share my experience and to encourage as many of you try this hike as possible. The lure is the cables, but beware, it's also the most dangerous place on the trail.
Make it a priority to research weather patterns before attempting to summit Half Dome. Most deaths are the result of bad weather, rain, lightening, and wind. In addition to the elements, accidents occur due to lack of preparation and making poor decisions. SAFETY FIRST PEOPLE!
DO NOT ATTEMPT HALF DOME UNDER ANY WEATHER CIRCUMSTANCE OTHER THAN CLEAR SKIES with zero PRECIPITATION.
YOU WILL SLIP AND FALL TO YOUR DEATH.
Phew. Got that off my chest. That sums up every single article I read about Half Dome. I don’t highlight these things to scare you away, but rather make sure you have a healthy respect for what you might face. Lack of preparation and recognition of what you are attempting is a safety risk! It is ok to be afraid, as long as it is a healthy fear! DO THIS HIKE!
HIKING HALF DOME


DIFFICULTY: difficult + dangerous.... :)
LOCATION: Eastern end of Yosemite Valley, in Yosemite National Park, California
SHUTTLE STOP: #16
PARKING: There is free parking at the trailhead near Upper Pines campground, but this fills up so arrive early to beat the crowds! Staying at the Lower Pines or Upper Pines campground (more information on campgrounds below) means you can WALK about .5 miles to the trailhead.
PREFERRED TRAILHEAD: Mist Trail. This is the most popular, most scenic (2 waterfalls), shortest (17 miles-ish), and the most dangerous trail (See above for dangers; avoid attempting to swim the rivers---the current is faster than you think---)
DISTANCE: WE HIKED 18 MILES.... YES, 18 MILES (via MIST TRAIL)!! Take a moment and wrap your head around that. The internet says 7 miles (one way), the park says 8.2 miles (one way), but let’s be completely honest: It is an almost 18-mile round trip from the Lower Pines campground. Be prepared!
OTHER TRAILHEADS: 16.5 miles (26.5 km) round trip via John Muir Trail (more flat, less scenic)
20 miles (32 km) round trip via Glacier Point
23 miles (37 km) round trip via Tenaya Lake
7 miles (11 km) round trip from Little Yosemite Valley campground
TIME: 8-14 hours out-and-back, depending on your experience/ fitness level; It took us 12.5 hours. We took a relaxed/enjoy-the-experience based approach... We stopped, took breaks, ate, enjoyed the waterfalls, etc. If your goal is to go up and down as fast as you can, you can easily (ha!) do this in 8-10 hours.
WHEN TO LEAVE: The earlier the better! We left the Lower Pines campsite at 6:20 a.m., and reached the summit of the sub-dome at 12:30 p.m. This is a very long hike; it's exhausting and will challenge you both mentally and physically. Give yourself the opportunity to take breaks if you need them. You don't want over exhaust yourself, or get hurt because you are trying to beat the daylight. You also want to ENJOY yourself and this experience. Stop, take pictures, eat, stretch, take a break... these are all things that will improve your experience and benefit your safety. We passed a lot on people on the trail who had started as early as 3 am. If you haven't reached the summit of the sub-dome (where they check your permits) by 3 pm, you should turn back.
TRAIL TYPE: out-and-back
TRAFFIC: Light/ Moderate
ELEVATION GAIN: 4,800 ft
ELEVATION: 8,842 ft
ANIMALS: NO ANIMALS ALLOWED; but you'll see plenty of wildlife along the way!
SHADE: 2/3 of the trail is shaded through the woods. The last 1/3 of the hike (sub-dome and main dome) there is no shade. Bring a hat, sunscreen, and something to cover your arms (more on my gear below)!
BATHROOMS: There are two different bathrooms on the way to the summit, however, come prepared to use the woods (nature, heeeeey!!!!) The first bathroom is just past the footbridge at Vernal Falls (1.5 miles into the hike).
HOURS OF OPERATION: 7 Days a week, while the cables are up (midMay - midOct)
RESERVATIONS: Reservations are not required to enter Yosemite. Park Entrance fee $35, per vehicle. You can obtain this upon arrival! CLICK HERE for all NPS Yosemite Fees and Alerts.
CAMPING & LODGING: These are linked for your convenience: You HAVE to book your camping, lodging, and backpacking accommodations ahead of time; these book up FAST! For Half Dome, I recommend staying at the Lower Pines or Upper Pines campgrounds. We stayed at the Lower Pines campsite, and were able to walk a short distance to the trailhead of Half Dome.
FACILITIES AT THE CAMPSITES: Accessible campsites, campfire rings, drinking water, flush toilets, food storage locker, host, shuttle bus service.
SHOWERS: Half Dome Village, $5 (towel is provided)
PERMIT FOR HALF DOME: YES!!! Permits are required 7 days a week while the cables are up (May 11 - Oct 9, 2018, depending on weather conditions). $10 PER application, then $10 PER person if you receive the permit through the lottery. The lottery is open from March 1 - March 31, and applicants will be notified of the results by mid-April. HOWEVER, you can still apply for permits in 2018!! APPLY HERE. Read more about Half Dome permits HERE. They also give out 50 day-of lottery permits, two days in advance. Example: If you want to hike on Friday, you need to apply for the permit on Wednesday; you will be notified Wednesday night.
BEST TIMES TO VISIT: WEEKDAYS! Monday-Thursday; weekends are busier if you can control when you get a permit. You have a 56% success rate of receiving a permit during the week, and only 31% on the weekends.
GEAR
INOV-8 TRAILTALON 235s: I can't imagine hiking Half Dome in any other shoe that my INOV-8 Trailtalon 235's. They are lightweight, durable, and have 4mm deep studs which provide an aggressive grip. These are perfect for the incline at the cables because they use three different types of rubbers to ensure stability. I did not slip ONCE on the 45 degree incline at the cables, and was in complete control (which kept me calm). I wore these shoes for all 18 miles without any pain. They provided me the safety and reassurance I needed for Half Dome.
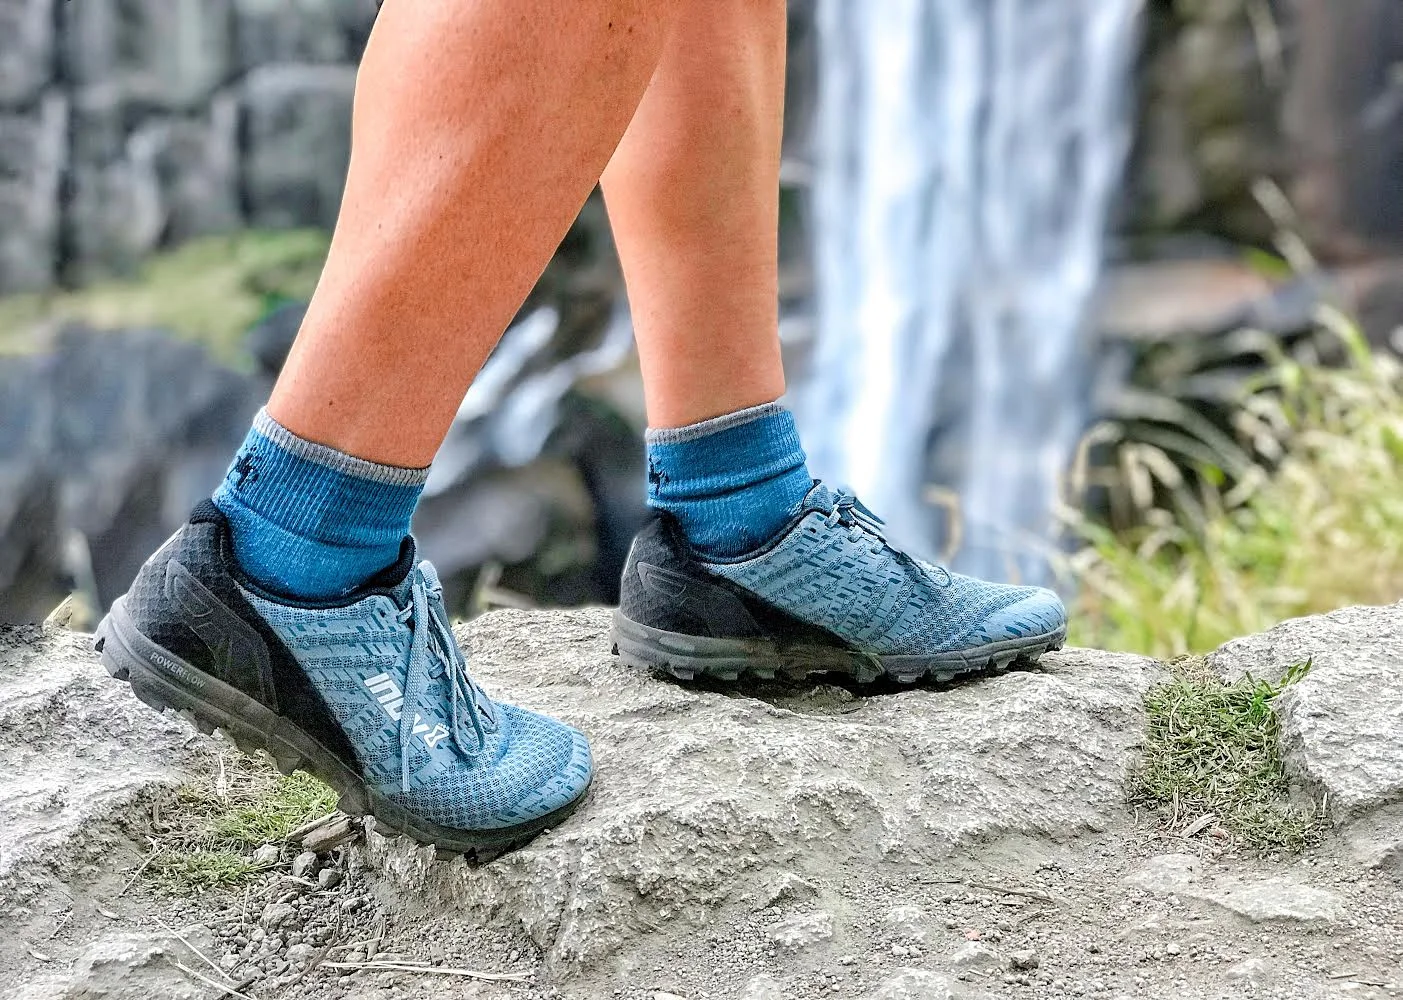
These run true to size; I could not recommend them more!
My women's INOV-8 TRAILTALON's 235. Here is also my exact shoe/ color in blue.
Men's INOV-8 TRAILALON 235
COLUMBIA HIKING SHIRT: My Columbia hiking shirt wicked and cooled my sweat so I stayed cool during the long hike. I also used it as protection from the sun (protects agains UV rays). Make sure you layer a cotton shirt underneath for maximum cooling! Amazon has a huge variety of colors HERE.
TREKKING POLES: I highly advise you to invest ($80-120) in trekking poles for this journey. They are amazing for your endurance and alleviate pressure on your joints. HERE ARE MY EXACT TREKKING POLES from REI.
GLOVES: You absolutely need a pair of gloves for the cables; nonnegotiable. I could not imagine getting up the cables without my Mad Grip garden gloves! I already did the research for you; these are the best on the market for Half Dome Cables. If you forget yours, there is a pile of them left at the base of Half Dome. This is a nice gesture, but the park doesn't encourage the littering.
FOOD & WATER
EATING BEFORE THE TRAIL: I advise you eat before starting, this is a long trek! We ate oatmeal with a banana at the campsite right before leaving. Eating is incredibly important; it will provide you early fuel for the trail, and provide sustained energy to your muscles to help avoid cramping.
What I STRATEGICALLY packed/ate on the Half Dome trail
2-3 BANANAS: regulate heart, provide your muscles with potassium (keeps you from cramping, you lose potassium when you sweat), vitamin C (repair of all body tissues), carbohydrates (endurance and works as fuel for your body).
3 PROTEIN BARS: protein bars are designed for easy digestion and quick nutrient absorption into your bloodstream, perfect for a long and strenuous hike like this. You won't want to sit and have a 'meal' during an activity like this, so protein bars will give your body the protein, vitamins, and minerals it needs. They rebuild and recovery of muscle tissue, provides sustained endurance, high in vitamins and minerals beneficial to your hike. *drink a few sips of water to aid digestion*
Here are some of my favorites on AMAZON:
1 PB&J SANDWICH: because duuuuuh :) honestly, we just wanted something tasty in the woods to eat when we needed a 'sit down' break!!
1 STARKIST LIGHT TUNA POUCH: a good source of lean protein & EPA omega-3 fatty acids; you can get these with olive oil for extra protein and flavor. Get your tuna HERE.
1 LIQUID IV: hydration packets filled with electrolytes; electrolytes prevent dehydration, maintain pH levels. 1 packet of Liquid IV provides your body with the same hydration at 2-3 bottles of water. Not only great on the hike, but we would drink one in the evening while camping. Get your LIQUID IV HERE.
2 CLIF BLOKS: These are slow release energy gel tabs designed to with your endurance in mind. I ate one package on the ascent and one during the descent. If you like gummy bears you will LOVE these!! They're my favorite type of slow release 'capsules,' however there are other types like gels and drink mixes. I’ve used them during Spartan Races, and it helped us complete the race without wearing ourselves out. Get your CLIF BLOKS HERE. *drink a few sips of water to aid digestion*
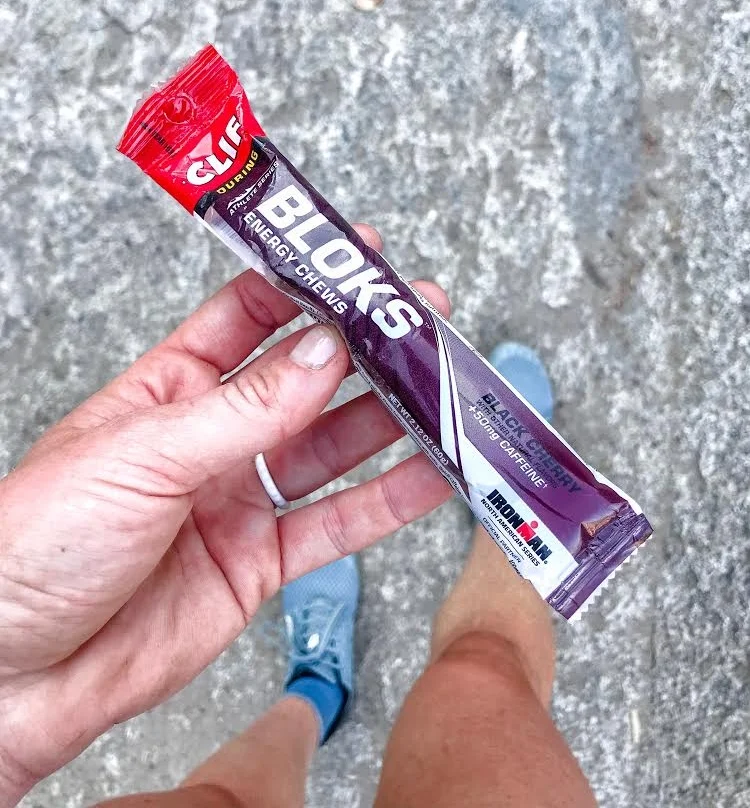
2 BAGS OF MIXED NUTS: high in (good) calories, protein, and heart-healthy fats.
WATER SOURCES: There is a water source across the bridge at Vernal Falls footbridge (1.5 miles into the hike along the trail). Otherwise, you’re in the woods. If you think you will need more water than you packed I recommend taking a water filtration system. There are streams along the way, so if you take a water filtration system you should be okay! Here’s an article by REI to help you understand the difference between purifying your water and filtration on the trails (as well as products to use).
How much water should you pack? Recommended is 1 gallon per person.
Personally, I packed 2.5 Liters (0.66 gallons!). I am a conservative water consumer when I hike; this means I sip my water enough to wet my pallet, and guzzle it down ONLY when I really need to. I ration my water appropriately from experience, but I wish I had more for this long hike. PLEASE pack 1 gallon of water!!!! I knew I was dehydrated because my lips were chapped at the end of the hike (this is also due to sun exposure/ licking lips/ wind), but I also know myself and my body. If you are at all unsure, stick to 1 gallon. My friends packed 1 gallon each and finished their water as we were finishing the hike. For comfort, use some type of bag with a water bladder AND pack extra water. Once you think you have enough water... pack a little more! *Scientifically, adults need 2 cups of water for every hour hiked, and children need 1-2 cups per hour of hike*
TIPS
TRASH: Make sure you pack your trash with you! Pack out what you pack in; there aren't any trash cans on the trail. Please, be respectful.
SUB-DOME: There are two domes; the sub-dome (switchbacks) and the main dome (cables). At the base of the sub-dome is the checkpoint where you will show your permit. That is the last place to use the bathroom, have shade, and take a break before venturing to the most dangerous parts of your hike. The sub-dome is a series of steep granite staircases that switchback to the base of the main dome. If you are scared of falling or heights, you won't make it past here, and you need to be okay with that. Your safety and comfort comes first! The switchbacks are just as difficult and 'scary' as the cables themselves, but much less talked about (not sure why).
TREKKING POLES: Once we got to the top of the sub-dome we hid our trekking poles behind a rock to pick-up later. You won't need them after this point in the trial (you can also pack them in your bag).
GOING UP THE CABLES: Now that you have reached your destination, put on your gloves! If there is a huge line or congestion on the cables (a lot of people going up-and-down), be smart and wait. There shouldn't be any rush for you to summit Half Dome at this point. Once the congestion dies down, begin your ascent! Try you use your LEGS to drive you up the granite, not your arms. Obviously you will need your arms, but they will quickly burn out trying to pull yourself up the cliff face. In between the metal posts there are wooden 2x4's. DO NOT BE ALARMED, they are often loose and seem unsteady; but use them as a resting point. This is the perfect place to stop and catch your breath, stay calm and gather your thoughts to proceed safely.

This my friend, Jason! You can see the wooden 2x4's, these are great spots to brace your grip and take a break.
GOING DOWN THE CABLES: You should have a good idea of your own technique after the 400 foot cable run up Half Dome! Best advice - Go BACKWARDS. This keeps you from falling forward :)
DON'T LOOK DOWN. JUST FOCUS ON THE AREA RIGHT IN FRONT AND AROUND YOU... YOU WILL BE FINE :)
GET A HARNESS: If you are absolutely petrified of heights, you can bring a harness. We saw people (and children!) who took the cables on with a harness. You essentially attach yourself to the cables to ensure that if you lose your grip, you are still attatched. You can get one HERE.
MORE TIPS....
Dont crawl. Please. It scares the shit out of everyone around you.
Don't scream. It really scares the shit out of people around you.
Don't gasp. It scares the living hell out of everyone around you!!
The main focus is on you, and yourself. It's honestly more of a mental game than anything else. We saw all ages (from 10 to late 50's) completing the cables so I know you can, too! The reason I advise no 'extra noises' is because everyone on the cables is freaked out; Everyone is nervous. As soon as one person vocalized their 'stress,' it will cause everyone around you to be in stress as well. This can cause safety problems!
My intention is not to scare you from hiking Half Dome, but to ultimately prepare you for a wicked adrenaline rush! Know your risks, go at your own pace, and BE PREPARED.
See you on the trails!!
~ Caitlin
MORE FROM OUR HALF DOME
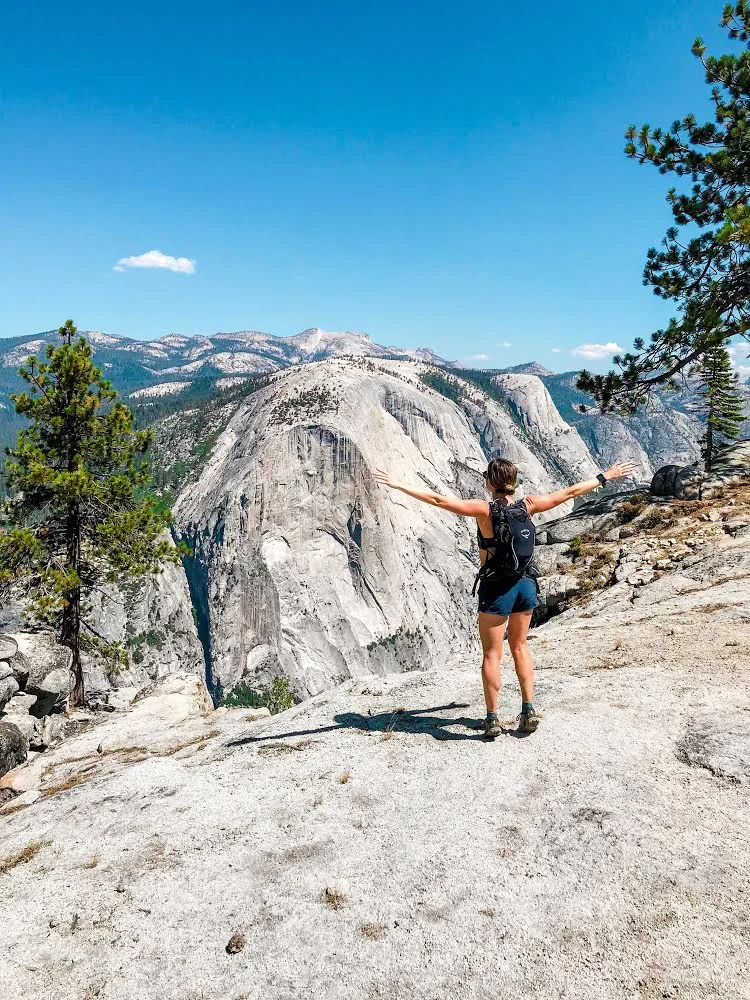


VERNAL FALLS

Eagle Rock Trailhead via the Pacific Crest Trail
Eagle Rock Trail is an easy-to-moderate hike for all ages and experience levels. Although it is longer (6.4 miles), it is one of the easiest hikes I have done in San Diego!
Difficulty: easy-to-moderate, good for all ages
Location: Warner Springs, CA (1 hour and 30 minutes from Downtown San Diego)
Trailhead Address: 31049 Hwy 79, Warner Springs, CA 92086
Distance: 6.4 miles
Time: 2-4 hours out-and-back, depending on your experience/ fitness level
Trail type: out-and-back
Traffic: Light/ Moderate
Elevation Gain: 1100 ft
Best Time to visit: March - October; early morning or in the evening when the temperatures are cool
Parking: Free parking across the street from the Fire Station (CAL Fire Warner Springs Station #52)
Animals: Dog and Horses allowed (please bring water!! I would not advise taking pets during the summer heat)
Bathrooms: There is a porta-potty at the beginning of the trailhead
Hours of Operation: Open all year
Fees/ Permits: N/A
Water sources: N/A Take plenty of water in your bag (it's a 6 mile hike!), and have an extra water bottle in your car for after your hike.
Food: I advise you eat before going and having some kind of fruit (banana, orange) and/or a protein bar to enjoy at Eagle Rock :)
Shade: You will walk through a meadow giving you shade the first half of the trail. Protect yourself with a hat, sunglasses, a long-sleeve shirt, and wear your water-proof sunscreen! This trail is out in the middle of the desert; you will need the protection the last half of the trail where there isn't any shade.


After the meadow, you will be in the open desert! At some point you will hit an intersection; continue straight through it to stay on the Eagle Rock trail.
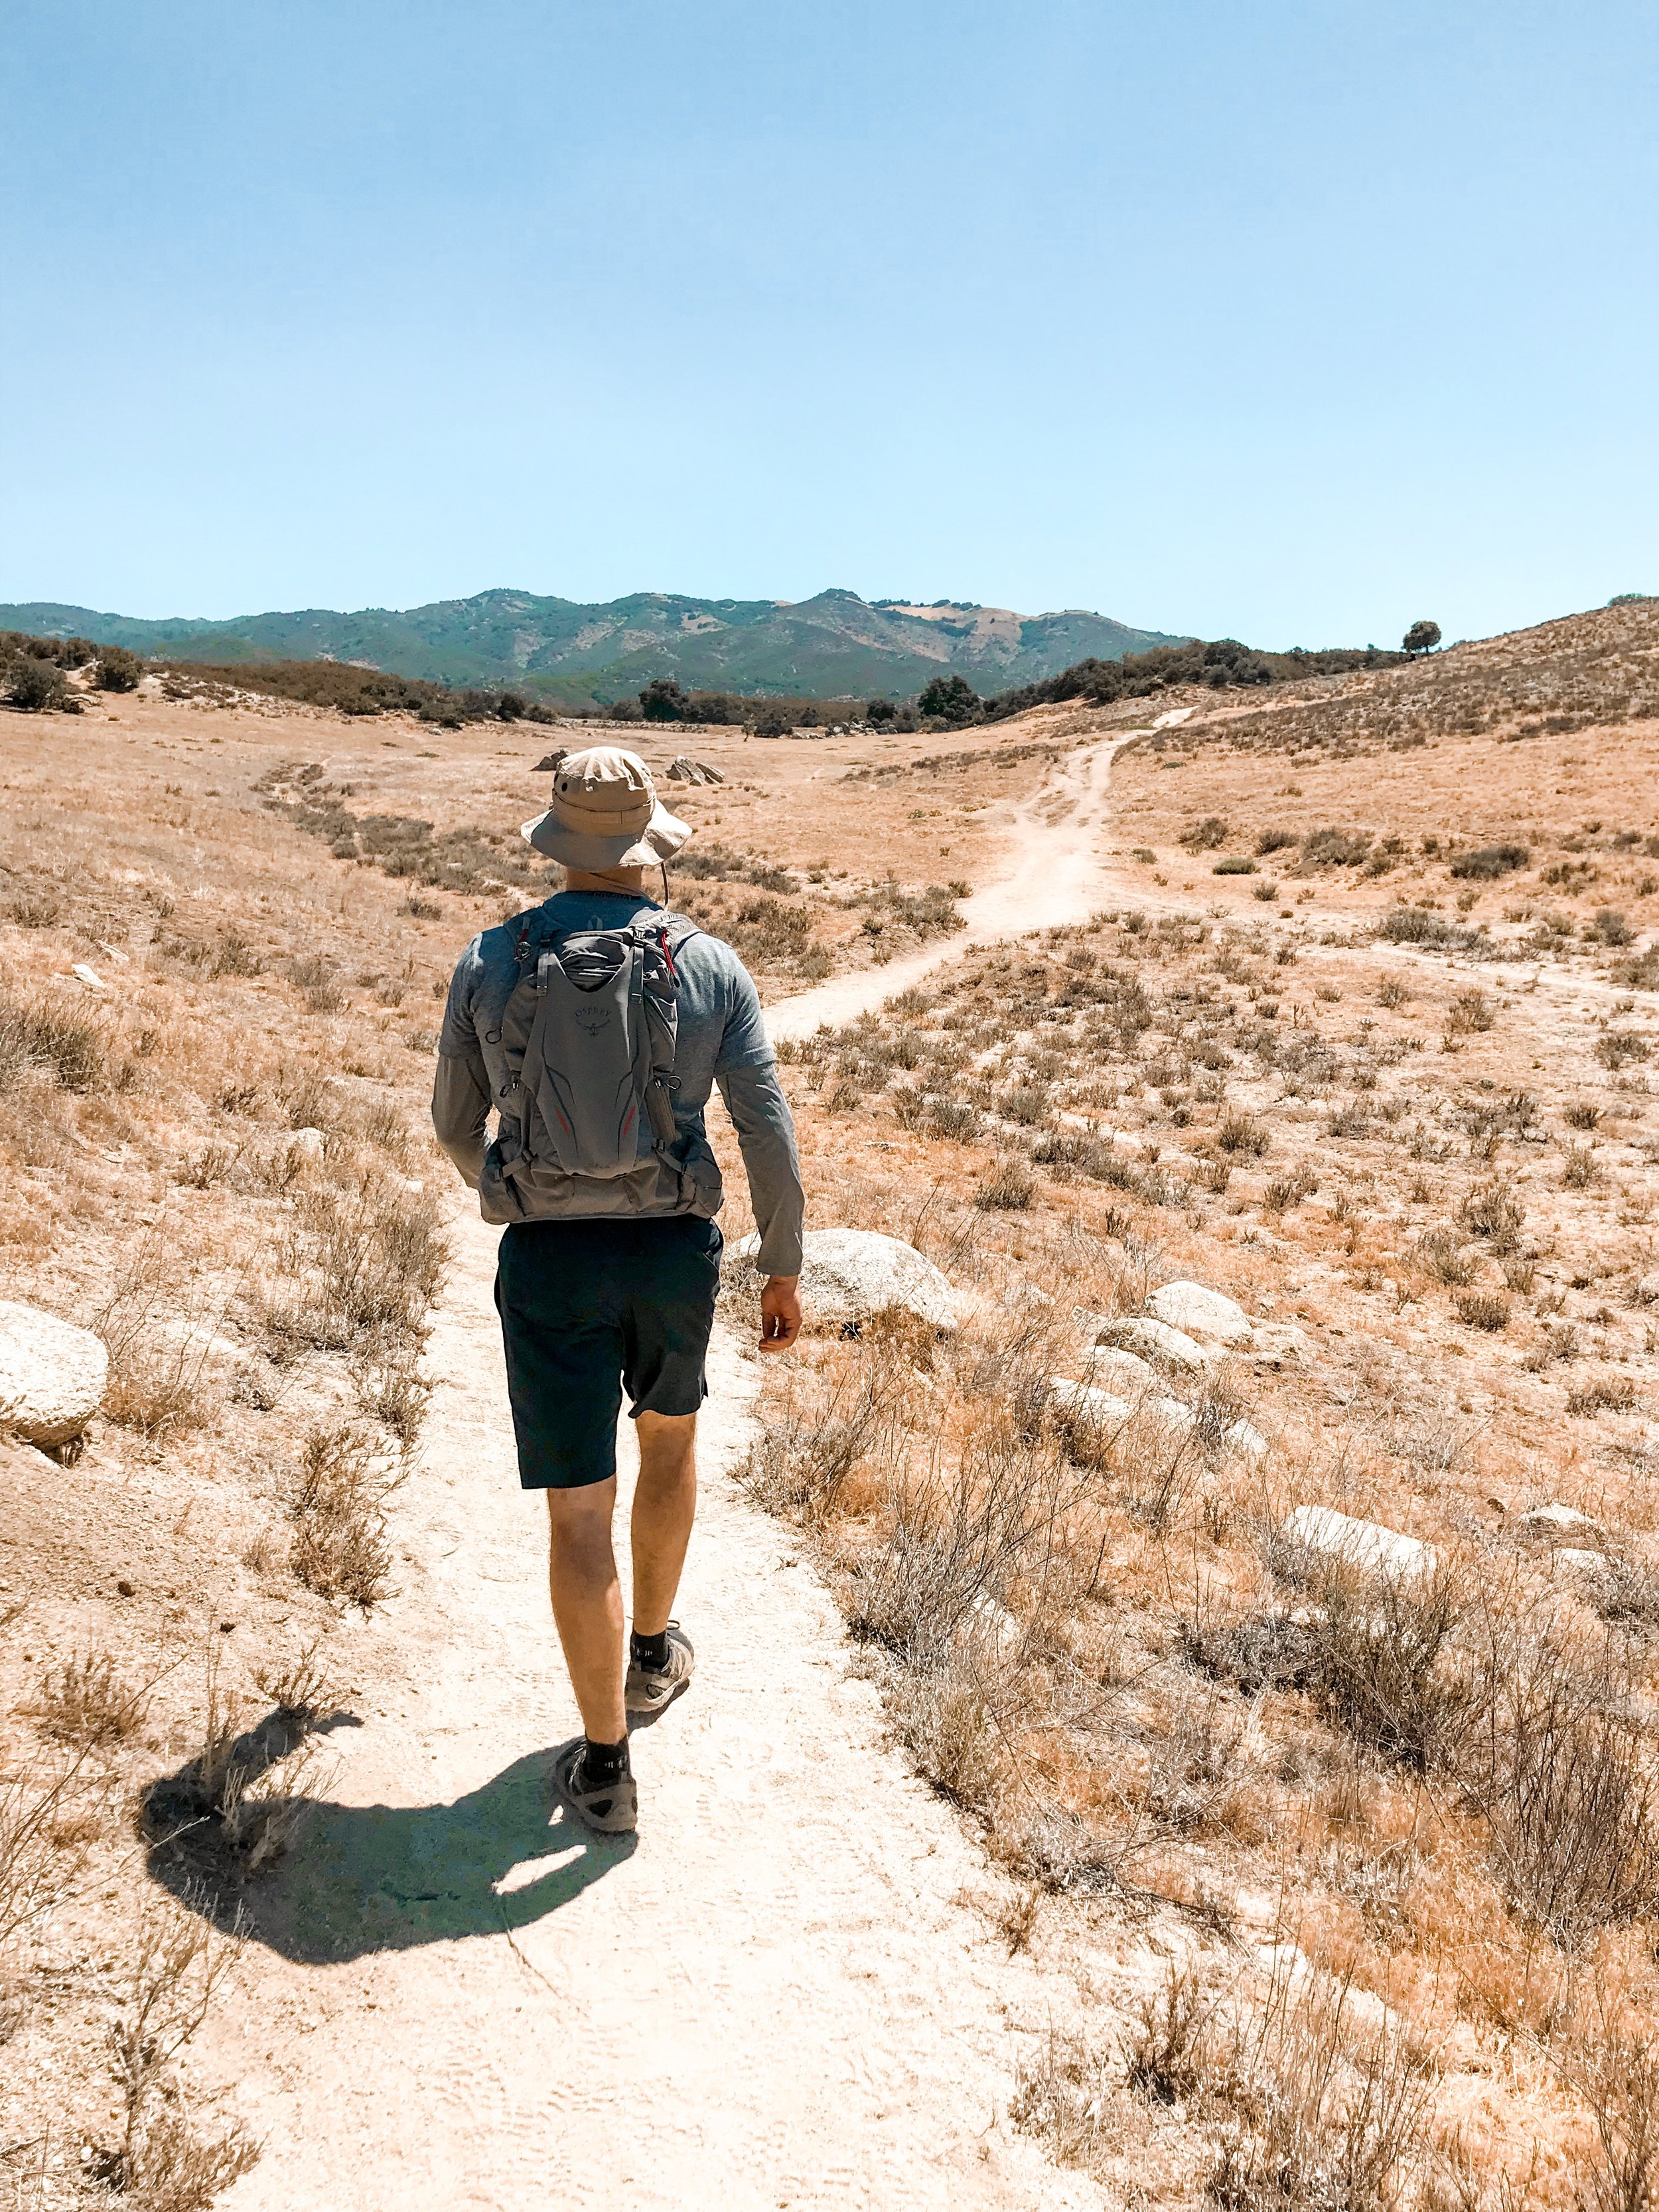
You will see that looks like a large pile of rocks around mile 3. You have to follow the path to the left (if you follow it to the right, your destination will be the same, just .5 miles longer). Once you turn the corner, the rocks will finally look like Eagle Rock, and you've reached your destination!
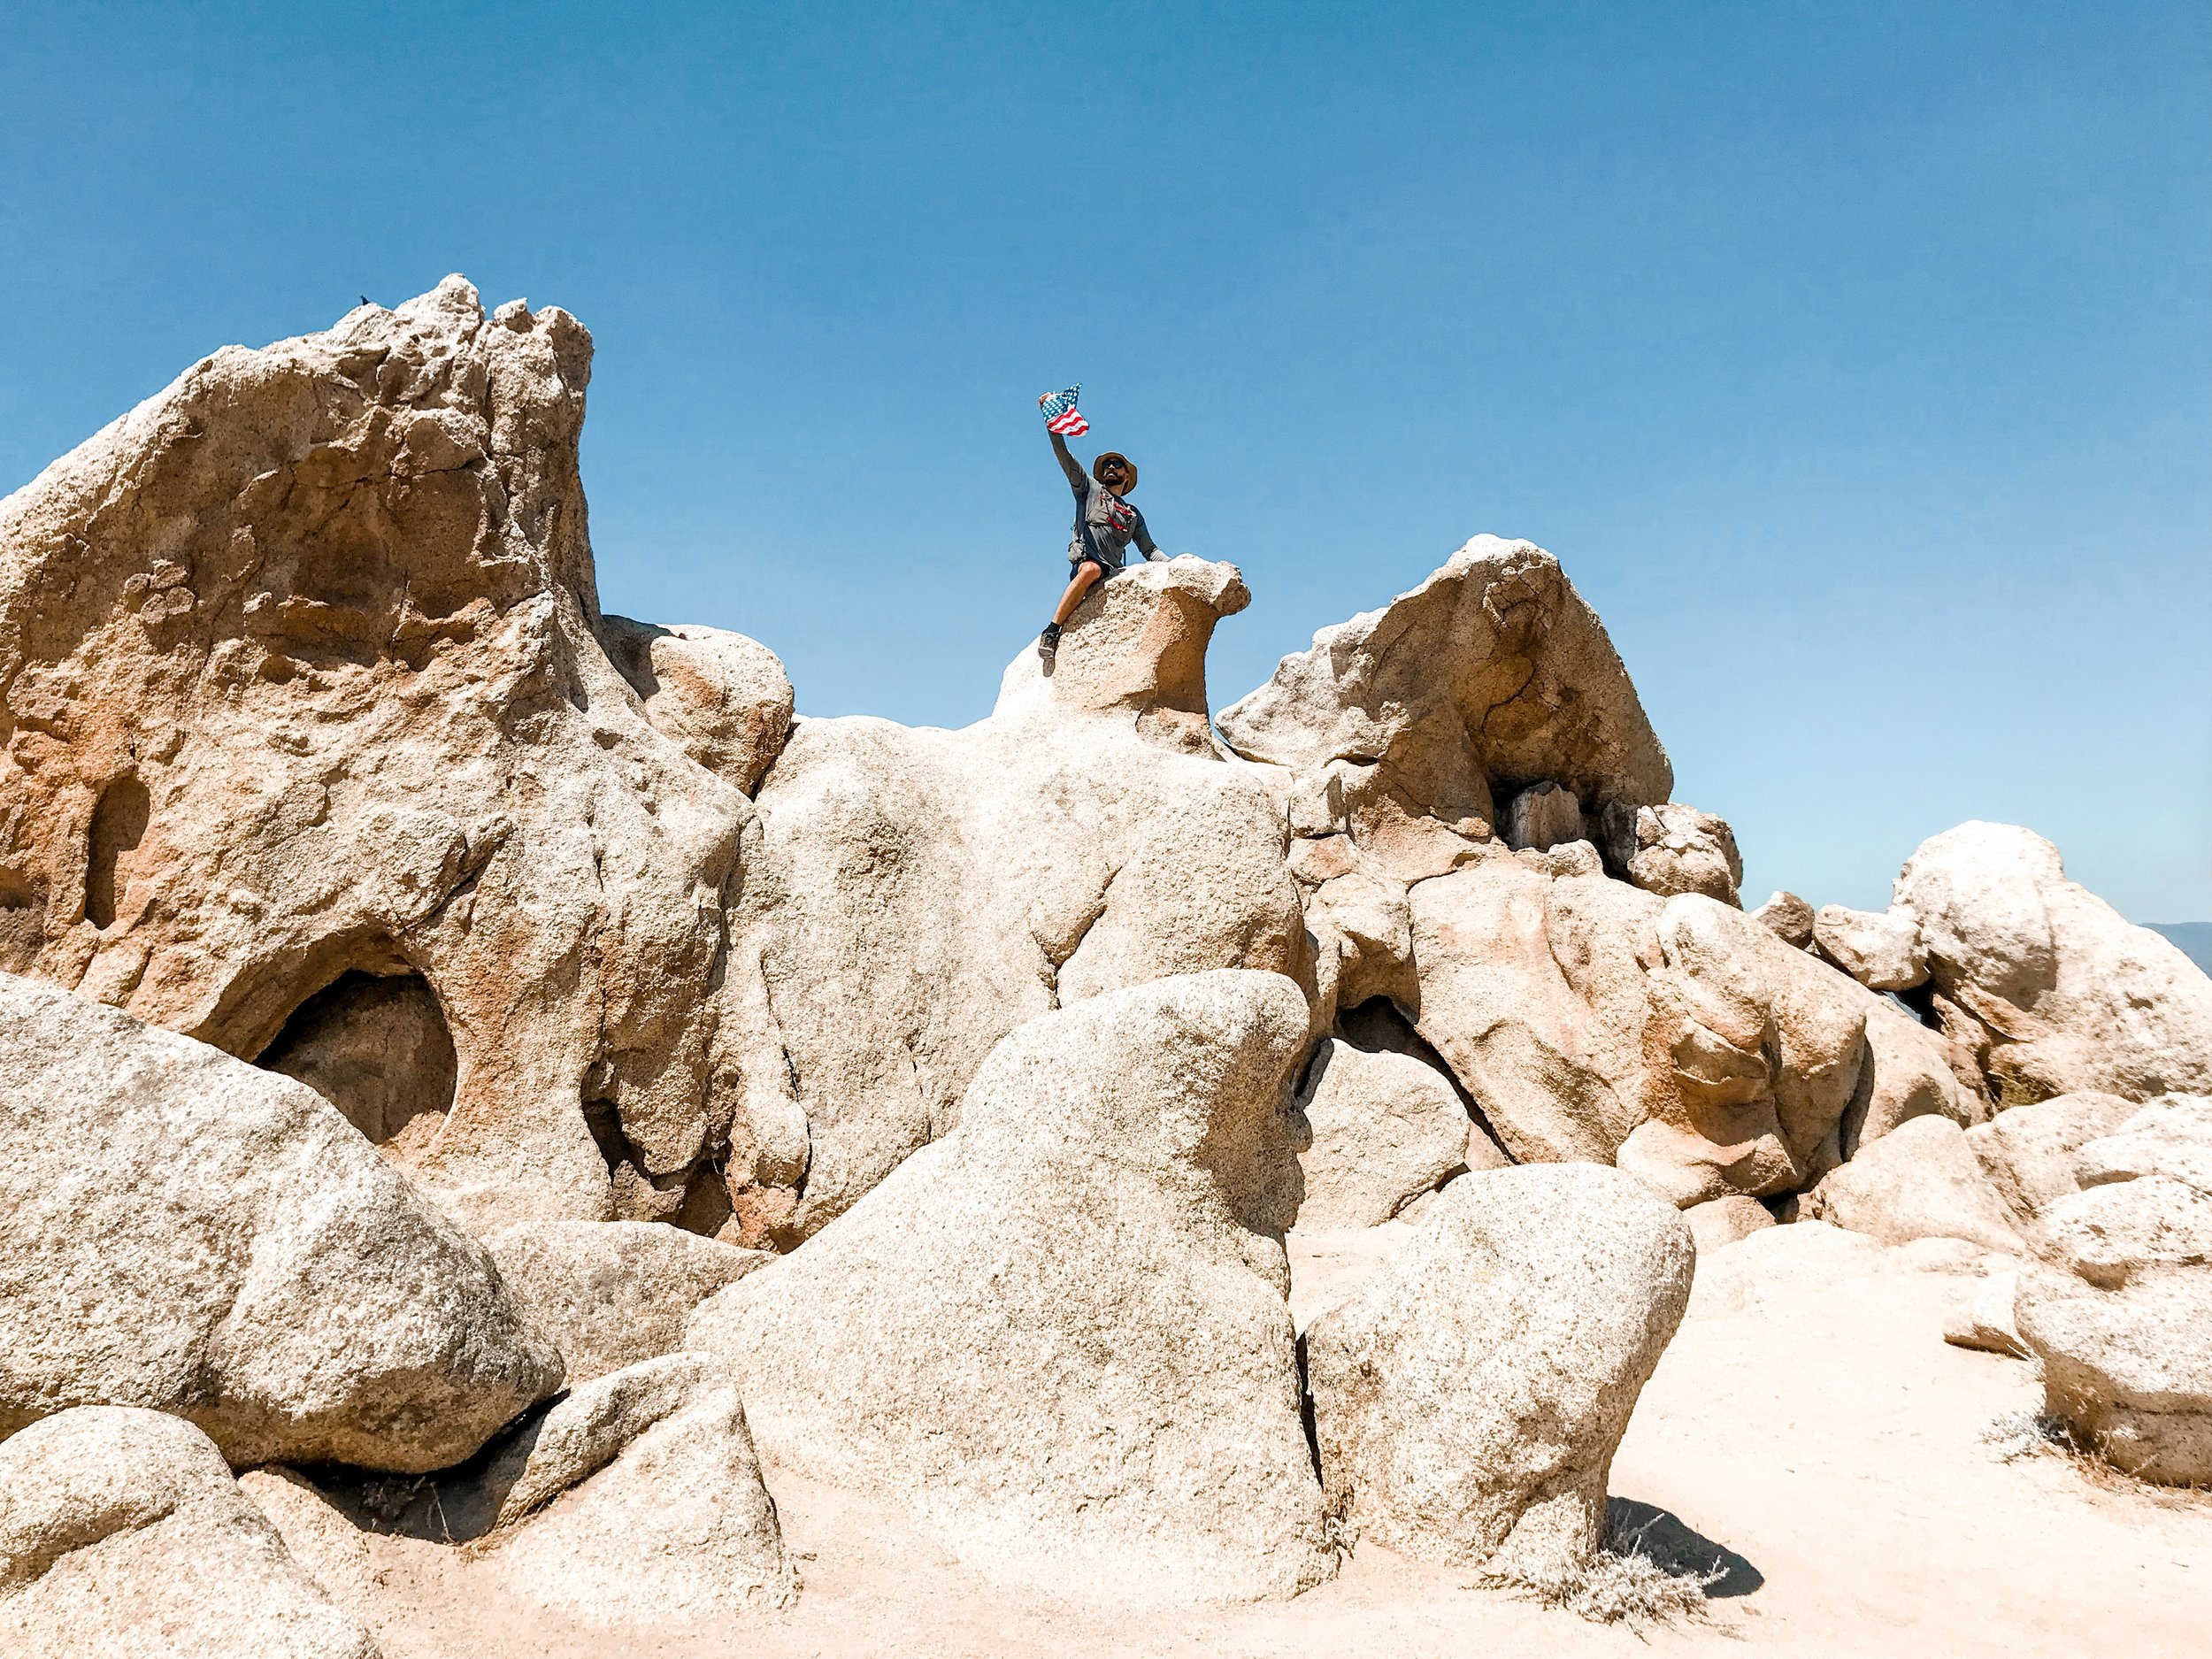


Happy Hiking!

When to visit San Diego, California
San Diego, you finally made the decision to visit America's Finest City, so now what? You want to plan your visit, but how do you decide when to come?
The good news is that there really is no bad time to visit San Diego, as our weather is consistently beautiful year round (we have it pretty tough here, ha!). If you have the luxury of tailoring your vacation to a certain time of year, I hope you find this post resourceful!

*bar graph is from tripsavvy.com
The best times to visit San Diego are March - May and September - November because this is our off-season. Not only can you get cheaper flights and hotel/ airbnb rates, but you will avoid the summer crowds!!


JANUARY
Average Temperature: 57°F
Average Sunshine: 72%
Average Rainfall: 1.98 inches
FEBRUARY
Average Temperature: 58°F
Average Sunshine: 72%
Average Rainfall: 2.35 inches
January - February are quieter months in San Diego, and the perfect time to come if you want to relax. The temperatures are cooler (for us!), just know ahead of time that February is our wettest month. Be prepared for rain, but the sun always comes out!
EVENTS
Bring in the New Year with a Polar Bear Plunge into the Pacific Ocean on January 1, with La Jolla Cove's Swim Club (am I the only one who thinks this sounds painful? ha!)
The whole month February is San Diego Museum Month, so admission to (most of) the museums in Balboa Park are half off.

*image from ouroyster.com
Drink your carbs at the San Diego Winter Brew Fest! They feature local beers from San Diego (and beyond), live music, and food.
MARCH
Average Temperature: 60°F
Average Sunshine: 70%
Average Rainfall: 1.81 inches
APRIL
Average Temperature: 62°F
Average Sunshine: 67%
Average Rainfall: 0.78 inches
This is one of the best times to visit San Diego because the weather is warming up, flowers are blooming, and we are still in our off-season (yay for less crowds)! The beaches start to see some action, but aren't yet over crowded.
EVENTS
Visit the Flower Fields at Carlsbad Ranch. The fields are open March 1 - May 13, 9 a.m. to 6 p.m. daily, and is located 40 minutes north of downtown. Admission is $16, and much bigger than the pictures lead on. You can easily spend a half day exploring the area!


We host the largest St. Patrick's Day Parade west of the Mississippi, which is followed by and Irish Festival in Balboa Park (family friendly). At night you can head to the shamROCK the Gaslamp block party (21+) to celebrate like a true Irishman!
Opening season for the Padres (MLB at Petco Park) begins in April. Ticket's are easy to get online or at the ticket booth day-of (local tip - ask the attendant for a view of downtown). Even if the team isn't amazing, the views, food, and local beer are worth an evening at the ballpark!

*image from www.usatoday.com
MAY
Average Temperature: 64°F
Average Sunshine: 59%
Average Rainfall: 0.12 inches
JUNE
Average Temperature: 67°F
Average Sunshine: 58%
Average Rainfall: 0.07 inches
Everyone assumes the San Diego weather is perfect year round (rightfully so), but May and June and the months I recommend least. During May and June we have a weird fog/marine layer that hangs around for most of the day; it looks like it's going to rain, but it never does. San Diegan's call this season MAY GREY and JUNE GLOOM.
EVENTS
The San Diego County Fair is June 1- July 4, and is the largest county fair in the United States. With over a million visitors each year, the fair focuses on agriculture and crafts, but provides unique entertainment, animals, rides, concerts, and food to try.

*image from San Diego Magazine*
Celebrate Cinco de Mayo in historic Old Town San Diego, California's first settlement. Old Town filled with museums, Mexican culture, live music, art, and history. They host a huge three-day celebration called Fiesta Old Town Cinco de Mayo each year, packed with plenty or margaritas!


Run in the San Diego Rock'n'Roll Marathon. This is a marathon course bringing athletes and musicians together for an inspiring event. Various bands and cheer teams line the course to motivate runners as they make their way through downtown. Tickets sell out well in advance, so I advise you to sign up for their email list!
JULY
Average Temperature: 70°F
Average Sunshine: 68%
Average Rainfall: 0.03 inches
AUGUST
Average Temperature: 72°F
Average Sunshine: 70%
Average Rainfall: 0.02 inches
If you are looking to escape to San Diego at its' peak, then this is when you want to come! The weather is warm, summer has claimed her territory, and there's A LOT to do! This is the best time to enjoy our beaches and outdoor activities like kayaking, snorkeling, paddle boarding, jet skiing, and surfing. The beaches are packed with sunbathers, families, music, and sports. This is when you will get to experience quintessential San Diego!
EVENTS
Big Bay Boom for the 4th of July We're famous for our Big Bay Boom fireworks show, at 9 p.m., where the city strategically places four barges around the bay for one of the biggest fireworks shows in the U.S. The fireworks can be seen from Shelter Island, Harbor Island, the Embarcadero, Seaport Village, and Coronado Landing, and is free! *4th of July is one of the most expensive weekends to visit*

*image from San Diego Magazine
Del Mar Thoroughbred Club - Opening day at the horse track is July 18th and will end in early September. People come from all over to bet on horses with hopes to win big. This is a popular summer event for patrons to enjoy the weather, dress up, socialize, and hopefully win some cash!

*image from arizonafoothills.com
Go to Comic-Con International: San Diego, AKA WHERE GEEK DREAMS COME TRUE! This is a multi-genre convention celebrating comics and similar fantasy entertainment. Comic-con is filled with action figures, anime, video games, zombies, superheroes, wizards, and fairies; basically if you can dream it, you'll see it here! It proves that geek culture is everyone's culture. Tickets are incredibly hard to get, so be sure to sign up for their email lists. Even if you can't get a ticket, it's a fun time to people watch in downtown San Diego; you might find yourself sharing a cocktail with Tortoro and Captain America!

*image from bandaiding.com
OCTOBER
Average Temperature: 67°F
Average Sunshine: 68%
Average Rainfall: 0.57 inches
SEPTEMBER
Average Temperature: 71°F
Average Sunshine: 69%
Average Rainfall: 0.15 inches
This is a beautiful time to visit San Diego. The weather is still warm, but summer is over so the crowds have died down. This pocket of time gives you so many options of things to experience during your visit. Not only can you still go to the beach, but you can take day trips to the mountains for cooler temperatures and 'fall' activities; it's the best of both worlds.
EVENTS
San Diego Restaurant Week is a celebration of local restaurants showcasing culinary diversity with prefixed menus at discounted prices. If you are a foodie, this week was MADE for you. SDRW is September 23-30, with over 180 participating restaurants.

Visit the town of Julian for their famous apple pies! Apple season begins as early as the end of August and lasts until mid October. This is an easy day trip if you have a car, and a must if you are visiting San Diego in the fall. The most popular apple pies in Julian are the Julian Pie Company, Mom's Pie House, and Apple Alley Bakery.

CRSSD Music Festival is a bi-annual oceanside music festival located at Waterfront Park, downtown San Diego. There are three stages featuring well-curated old school and new artists. The backdrop to the stages are spectacular views of downtown and the San Diego Bay.


NOVEMBER
Average Temperature: 62°F
Average Sunshine: 75%
Average Rainfall: 1.01 inches
DECEMBER
Average Temperature: 57°F
Average Sunshine: 73%
Average Rainfall: 1.53 inches
Cooler nights, stunning sunsets, and a quieter experience is what you will get in San Diego if you visit in November and December. I love the holidays in San Diego because its a unique experience (especially since I come from the East Coast).
EVENTS
Jungle Bells at the San Diego Zoo is my favorite time to visit the zoo, and it runs December 8-January 1. We always go to the zoo in the evening for the "Celebration of Lights," which is a musical experience/ animal-themed parade.

*image from Pinterest
December Nights at Balboa Park is free to attend, and is a local Christmas tradition. It is a park-wide event where you can enjoy entertainment, live music, Christmas lights, and free admission in the evenings to most of the museums.

*image is from lajollamom.com
Skating by the Sea at Hotel Del Coronado is a unique experience you can only enjoy in a city like San Diego. The outdoor ice-skating rink is on the Windsor Lawn, which probably doesn't mean anything to you, so basically, it's ice-skating at the beach!

*image is from www.localadventurer.com
I hope this helps you plan your next trip to San Diego. Let me know if you have any questions about visiting, I'm always happy to help!
- caitlin