

HOW NOT TO DIE: HALF DOME
HALF DOME: One of the major hikes you should do before you die, but don’t die doing it!
The way I see it, you are here for one of two reasons: you either want to experience the majesty of hiking Half Dome yourself …or you are here because you want to know what the hell I got myself into last weekend!!!
If you want help planning your own trip, I’m here to prepare you for a safe, fun, and crazy adventure. If you are here for the second…truth is, I've been wondering the saaaaame thing…

If you have never heard of Half Dome, but are dying (haha!) to get that IG pic between cables on the granite rock face; you've come to the right place. My purpose with this post is to both share my experience and to encourage as many of you try this hike as possible. The lure is the cables, but beware, it's also the most dangerous place on the trail.
Make it a priority to research weather patterns before attempting to summit Half Dome. Most deaths are the result of bad weather, rain, lightening, and wind. In addition to the elements, accidents occur due to lack of preparation and making poor decisions. SAFETY FIRST PEOPLE!
DO NOT ATTEMPT HALF DOME UNDER ANY WEATHER CIRCUMSTANCE OTHER THAN CLEAR SKIES with zero PRECIPITATION.
YOU WILL SLIP AND FALL TO YOUR DEATH.
Phew. Got that off my chest. That sums up every single article I read about Half Dome. I don’t highlight these things to scare you away, but rather make sure you have a healthy respect for what you might face. Lack of preparation and recognition of what you are attempting is a safety risk! It is ok to be afraid, as long as it is a healthy fear! DO THIS HIKE!
HIKING HALF DOME


DIFFICULTY: difficult + dangerous.... :)
LOCATION: Eastern end of Yosemite Valley, in Yosemite National Park, California
SHUTTLE STOP: #16
PARKING: There is free parking at the trailhead near Upper Pines campground, but this fills up so arrive early to beat the crowds! Staying at the Lower Pines or Upper Pines campground (more information on campgrounds below) means you can WALK about .5 miles to the trailhead.
PREFERRED TRAILHEAD: Mist Trail. This is the most popular, most scenic (2 waterfalls), shortest (17 miles-ish), and the most dangerous trail (See above for dangers; avoid attempting to swim the rivers---the current is faster than you think---)
DISTANCE: WE HIKED 18 MILES.... YES, 18 MILES (via MIST TRAIL)!! Take a moment and wrap your head around that. The internet says 7 miles (one way), the park says 8.2 miles (one way), but let’s be completely honest: It is an almost 18-mile round trip from the Lower Pines campground. Be prepared!
OTHER TRAILHEADS: 16.5 miles (26.5 km) round trip via John Muir Trail (more flat, less scenic)
20 miles (32 km) round trip via Glacier Point
23 miles (37 km) round trip via Tenaya Lake
7 miles (11 km) round trip from Little Yosemite Valley campground
TIME: 8-14 hours out-and-back, depending on your experience/ fitness level; It took us 12.5 hours. We took a relaxed/enjoy-the-experience based approach... We stopped, took breaks, ate, enjoyed the waterfalls, etc. If your goal is to go up and down as fast as you can, you can easily (ha!) do this in 8-10 hours.
WHEN TO LEAVE: The earlier the better! We left the Lower Pines campsite at 6:20 a.m., and reached the summit of the sub-dome at 12:30 p.m. This is a very long hike; it's exhausting and will challenge you both mentally and physically. Give yourself the opportunity to take breaks if you need them. You don't want over exhaust yourself, or get hurt because you are trying to beat the daylight. You also want to ENJOY yourself and this experience. Stop, take pictures, eat, stretch, take a break... these are all things that will improve your experience and benefit your safety. We passed a lot on people on the trail who had started as early as 3 am. If you haven't reached the summit of the sub-dome (where they check your permits) by 3 pm, you should turn back.
TRAIL TYPE: out-and-back
TRAFFIC: Light/ Moderate
ELEVATION GAIN: 4,800 ft
ELEVATION: 8,842 ft
ANIMALS: NO ANIMALS ALLOWED; but you'll see plenty of wildlife along the way!
SHADE: 2/3 of the trail is shaded through the woods. The last 1/3 of the hike (sub-dome and main dome) there is no shade. Bring a hat, sunscreen, and something to cover your arms (more on my gear below)!
BATHROOMS: There are two different bathrooms on the way to the summit, however, come prepared to use the woods (nature, heeeeey!!!!) The first bathroom is just past the footbridge at Vernal Falls (1.5 miles into the hike).
HOURS OF OPERATION: 7 Days a week, while the cables are up (midMay - midOct)
RESERVATIONS: Reservations are not required to enter Yosemite. Park Entrance fee $35, per vehicle. You can obtain this upon arrival! CLICK HERE for all NPS Yosemite Fees and Alerts.
CAMPING & LODGING: These are linked for your convenience: You HAVE to book your camping, lodging, and backpacking accommodations ahead of time; these book up FAST! For Half Dome, I recommend staying at the Lower Pines or Upper Pines campgrounds. We stayed at the Lower Pines campsite, and were able to walk a short distance to the trailhead of Half Dome.
FACILITIES AT THE CAMPSITES: Accessible campsites, campfire rings, drinking water, flush toilets, food storage locker, host, shuttle bus service.
SHOWERS: Half Dome Village, $5 (towel is provided)
PERMIT FOR HALF DOME: YES!!! Permits are required 7 days a week while the cables are up (May 11 - Oct 9, 2018, depending on weather conditions). $10 PER application, then $10 PER person if you receive the permit through the lottery. The lottery is open from March 1 - March 31, and applicants will be notified of the results by mid-April. HOWEVER, you can still apply for permits in 2018!! APPLY HERE. Read more about Half Dome permits HERE. They also give out 50 day-of lottery permits, two days in advance. Example: If you want to hike on Friday, you need to apply for the permit on Wednesday; you will be notified Wednesday night.
BEST TIMES TO VISIT: WEEKDAYS! Monday-Thursday; weekends are busier if you can control when you get a permit. You have a 56% success rate of receiving a permit during the week, and only 31% on the weekends.
GEAR
INOV-8 TRAILTALON 235s: I can't imagine hiking Half Dome in any other shoe that my INOV-8 Trailtalon 235's. They are lightweight, durable, and have 4mm deep studs which provide an aggressive grip. These are perfect for the incline at the cables because they use three different types of rubbers to ensure stability. I did not slip ONCE on the 45 degree incline at the cables, and was in complete control (which kept me calm). I wore these shoes for all 18 miles without any pain. They provided me the safety and reassurance I needed for Half Dome.
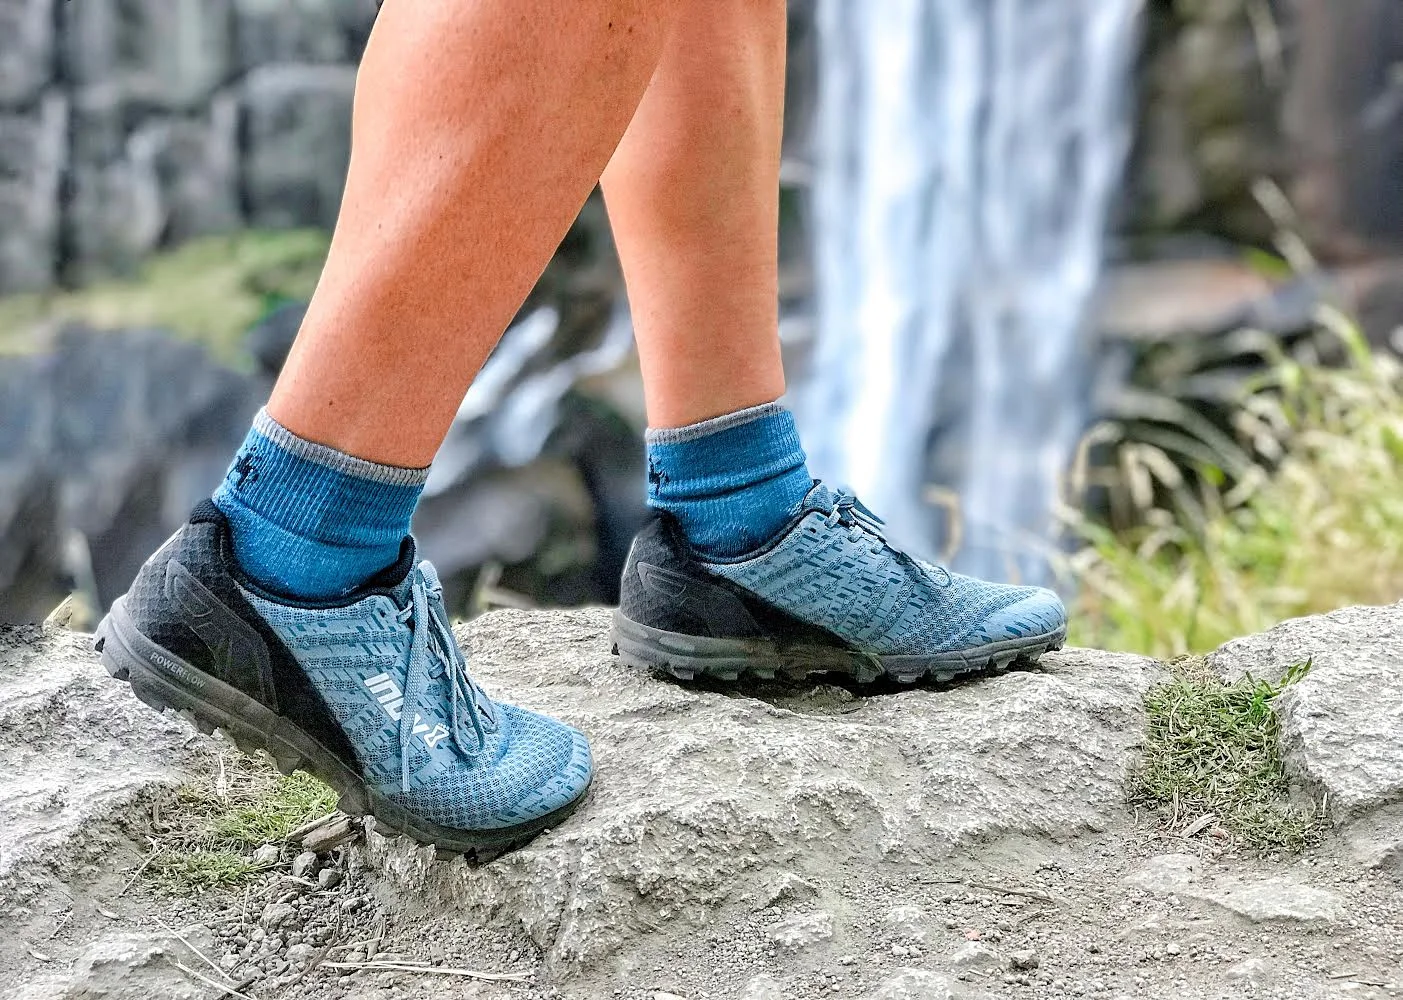
These run true to size; I could not recommend them more!
My women's INOV-8 TRAILTALON's 235. Here is also my exact shoe/ color in blue.
Men's INOV-8 TRAILALON 235
COLUMBIA HIKING SHIRT: My Columbia hiking shirt wicked and cooled my sweat so I stayed cool during the long hike. I also used it as protection from the sun (protects agains UV rays). Make sure you layer a cotton shirt underneath for maximum cooling! Amazon has a huge variety of colors HERE.
TREKKING POLES: I highly advise you to invest ($80-120) in trekking poles for this journey. They are amazing for your endurance and alleviate pressure on your joints. HERE ARE MY EXACT TREKKING POLES from REI.
GLOVES: You absolutely need a pair of gloves for the cables; nonnegotiable. I could not imagine getting up the cables without my Mad Grip garden gloves! I already did the research for you; these are the best on the market for Half Dome Cables. If you forget yours, there is a pile of them left at the base of Half Dome. This is a nice gesture, but the park doesn't encourage the littering.
FOOD & WATER
EATING BEFORE THE TRAIL: I advise you eat before starting, this is a long trek! We ate oatmeal with a banana at the campsite right before leaving. Eating is incredibly important; it will provide you early fuel for the trail, and provide sustained energy to your muscles to help avoid cramping.
What I STRATEGICALLY packed/ate on the Half Dome trail
2-3 BANANAS: regulate heart, provide your muscles with potassium (keeps you from cramping, you lose potassium when you sweat), vitamin C (repair of all body tissues), carbohydrates (endurance and works as fuel for your body).
3 PROTEIN BARS: protein bars are designed for easy digestion and quick nutrient absorption into your bloodstream, perfect for a long and strenuous hike like this. You won't want to sit and have a 'meal' during an activity like this, so protein bars will give your body the protein, vitamins, and minerals it needs. They rebuild and recovery of muscle tissue, provides sustained endurance, high in vitamins and minerals beneficial to your hike. *drink a few sips of water to aid digestion*
Here are some of my favorites on AMAZON:
1 PB&J SANDWICH: because duuuuuh :) honestly, we just wanted something tasty in the woods to eat when we needed a 'sit down' break!!
1 STARKIST LIGHT TUNA POUCH: a good source of lean protein & EPA omega-3 fatty acids; you can get these with olive oil for extra protein and flavor. Get your tuna HERE.
1 LIQUID IV: hydration packets filled with electrolytes; electrolytes prevent dehydration, maintain pH levels. 1 packet of Liquid IV provides your body with the same hydration at 2-3 bottles of water. Not only great on the hike, but we would drink one in the evening while camping. Get your LIQUID IV HERE.
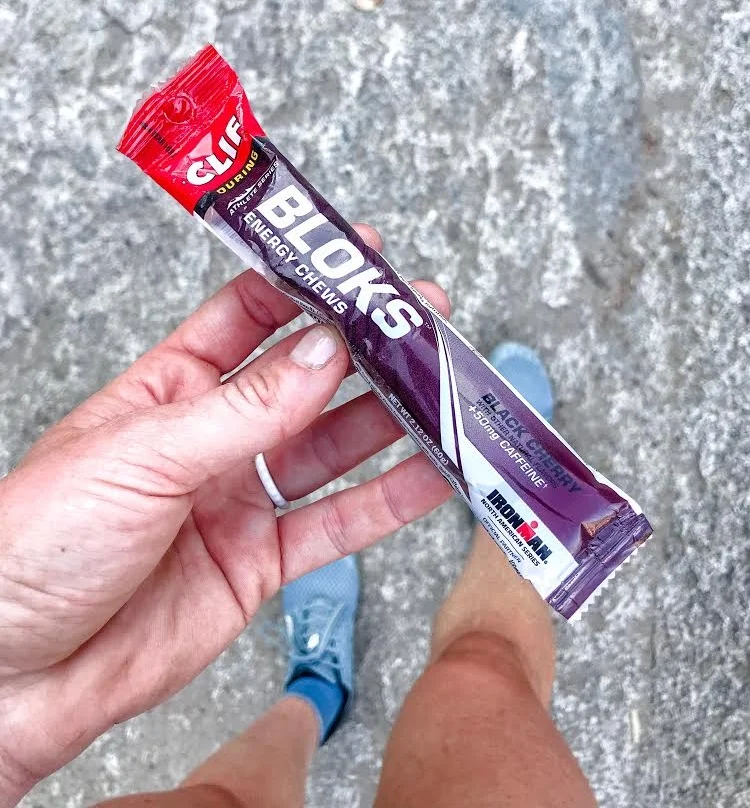
2 CLIF BLOKS: These are slow release energy gel tabs designed to with your endurance in mind. I ate one package on the ascent and one during the descent. If you like gummy bears you will LOVE these!! They're my favorite type of slow release 'capsules,' however there are other types like gels and drink mixes. I’ve used them during Spartan Races, and it helped us complete the race without wearing ourselves out. Get your CLIF BLOKS HERE. *drink a few sips of water to aid digestion*
2 BAGS OF MIXED NUTS: high in (good) calories, protein, and heart-healthy fats.
WATER SOURCES: There is a water source across the bridge at Vernal Falls footbridge (1.5 miles into the hike along the trail). Otherwise, you’re in the woods. If you think you will need more water than you packed I recommend taking a water filtration system. There are streams along the way, so if you take a water filtration system you should be okay! Here’s an article by REI to help you understand the difference between purifying your water and filtration on the trails (as well as products to use).
How much water should you pack? Recommended is 1 gallon per person.
Personally, I packed 2.5 Liters (0.66 gallons!). I am a conservative water consumer when I hike; this means I sip my water enough to wet my pallet, and guzzle it down ONLY when I really need to. I ration my water appropriately from experience, but I wish I had more for this long hike. PLEASE pack 1 gallon of water!!!! I knew I was dehydrated because my lips were chapped at the end of the hike (this is also due to sun exposure/ licking lips/ wind), but I also know myself and my body. If you are at all unsure, stick to 1 gallon. My friends packed 1 gallon each and finished their water as we were finishing the hike. For comfort, use some type of bag with a water bladder AND pack extra water. Once you think you have enough water... pack a little more! *Scientifically, adults need 2 cups of water for every hour hiked, and children need 1-2 cups per hour of hike*
TIPS
TRASH: Make sure you pack your trash with you! Pack out what you pack in; there aren't any trash cans on the trail. Please, be respectful.
SUB-DOME: There are two domes; the sub-dome (switchbacks) and the main dome (cables). At the base of the sub-dome is the checkpoint where you will show your permit. That is the last place to use the bathroom, have shade, and take a break before venturing to the most dangerous parts of your hike. The sub-dome is a series of steep granite staircases that switchback to the base of the main dome. If you are scared of falling or heights, you won't make it past here, and you need to be okay with that. Your safety and comfort comes first! The switchbacks are just as difficult and 'scary' as the cables themselves, but much less talked about (not sure why).
TREKKING POLES: Once we got to the top of the sub-dome we hid our trekking poles behind a rock to pick-up later. You won't need them after this point in the trial (you can also pack them in your bag).
GOING UP THE CABLES: Now that you have reached your destination, put on your gloves! If there is a huge line or congestion on the cables (a lot of people going up-and-down), be smart and wait. There shouldn't be any rush for you to summit Half Dome at this point. Once the congestion dies down, begin your ascent! Try you use your LEGS to drive you up the granite, not your arms. Obviously you will need your arms, but they will quickly burn out trying to pull yourself up the cliff face. In between the metal posts there are wooden 2x4's. DO NOT BE ALARMED, they are often loose and seem unsteady; but use them as a resting point. This is the perfect place to stop and catch your breath, stay calm and gather your thoughts to proceed safely.

This my friend, Jason! You can see the wooden 2x4's, these are great spots to brace your grip and take a break.
GOING DOWN THE CABLES: You should have a good idea of your own technique after the 400 foot cable run up Half Dome! Best advice - Go BACKWARDS. This keeps you from falling forward :)
DON'T LOOK DOWN. JUST FOCUS ON THE AREA RIGHT IN FRONT AND AROUND YOU... YOU WILL BE FINE :)
GET A HARNESS: If you are absolutely petrified of heights, you can bring a harness. We saw people (and children!) who took the cables on with a harness. You essentially attach yourself to the cables to ensure that if you lose your grip, you are still attatched. You can get one HERE.
MORE TIPS....
Dont crawl. Please. It scares the shit out of everyone around you.
Don't scream. It really scares the shit out of people around you.
Don't gasp. It scares the living hell out of everyone around you!!
The main focus is on you, and yourself. It's honestly more of a mental game than anything else. We saw all ages (from 10 to late 50's) completing the cables so I know you can, too! The reason I advise no 'extra noises' is because everyone on the cables is freaked out; Everyone is nervous. As soon as one person vocalized their 'stress,' it will cause everyone around you to be in stress as well. This can cause safety problems!
My intention is not to scare you from hiking Half Dome, but to ultimately prepare you for a wicked adrenaline rush! Know your risks, go at your own pace, and BE PREPARED.
See you on the trails!!
~ Caitlin
MORE FROM OUR HALF DOME


VERNAL FALLS


